
Moonark Projects
“The MoonArk is a highly collaborative and massively integrated project headed to the Moon intended to spark wonderment for future humans through poetically entangled visual narratives of the arts, humanities, sciences, and technologies.” -Moonarts.org
This page surveys a collection of projects I worked on over the course of several years in support of the Moonark. Working in collaboration with the core team of project founders, I did research into potential future directions for the project, generated content for the website and press releases, and lead in the design and fabrication of a custom traveling exhibition for display worldwide.
Familiarization - Moonroom Wall
“In 2021, Carnegie Mellon University is sending the first museum to the Moon aboard an Astrobotic lander. Our project, called “The MoonArk,” is a gift of life and hope to future humans embodied by all the arts, enlarging the lunar mission to ponder how the Moon stirs the tides, the growth patterns of life, the rhythms of society, and how the Moon always continues to pull us further into the heavens.” -Moonarts.org
I was introduced to the Moonark project early on in my pursuit of a Design degree at CMU. Several of my professors in the program were the founding members of the project, and had been developing it for over a decade already at that time. After completing my first two years in the program, they invited me to join the project as a part-time intern. My first task was to organize wall of prints in the “Moonroom” where the project is headquartered on campus; this would serve as inspiration for future directions for the project.
This simple exercise of curating a wall of inspiration—and referring to the project website while doing so—was a great way to familiarize myself more deeply with the concepts and contents that make up the project. Learning more about the conceptual framework of the four chambers (Earth, Metasphere, Moon, and Ether) was a crucial step towards contributing to the project, and surveying the broad range of artistic and intellectual contributions to the moon museum provided great inspiration for ways to do so.
Time Capsule - Research and Concept Development
After becoming more intimately familiar with the Moonark, my first in-depth project was to develop a concept for a participatory time capsule inspired by it. The idea was that this time capsule template would be accessible to anyone in the world and prompt people to reflect on the Moonark ethos to help them meaningfully create their personalized contents. This would help the Moonark reach a broader audience and add an earth-based activity for people to do in parallel to the journey of the moon museum.


I began by researching the history of time capsules, and surveyed the most historically significant ones in existence today. I then moved on to looking at open-sourced repositories of life and culture online, and also highlighted a few significant analog capsules I had experienced in my own life. Finally, I wrote prompts that mirrored the framework of the four chambers. These explained the meaning of each chamber and asked the reader to reflect on these ideas with a personal lens, with the end goal of producing an artifact that encapsulated their ideas.
After developing the prompts for the time capsule project, I had the opportunity to join the Moonark team in presenting this idea to a local design firm. The hope was that they could provide new insights into how the vessel could look, how to raise awareness for the project, and successfully distribute the capsules to people seeking to participate.
Updating Press Page
After having worked on the project for some time, I began to take on new responsibilities on the team. One of these was to help keep the website up to date by adding all relevant press releases to the News page. By this time the project had achieved global acclaim, so there were often new stories to add.
A few of my favorite recent articles from moonarts.org/news/
Popular Science - How to send messages 10,000 years into the future
CNN - MoonArk will be a philosophical mini-museum, left on the moon for future explorers to discover
Arts Management & Technology Laboratory - Museum On The Moon: An Interview With The MoonArk Team
Chamber Assembly Animation
I then moved on to what would become one of my key contributions: generating web content to promote the project. I created a rotating animation of the Moonark for the homepage of the website, intended to replace the still image of the stacked chambers.
Conveniently, the website features an interactive, exploded view of each chamber; I used this as a guide when reassembling the many CAD components of the Moonark. I made sure to position and light each of the murals for maximum visibilty, and replicated the color and texture of the metal in the rendering software as closely as possible.
Once I had replicated the model as it appears on the site—with the exception of adding the cap to the top chamber—I created the animation of it spinning. This clip could be looped endlessly when viewed on the homepage.
Rendering Astrobotic Moon Lander
I then moved on to one of the most significant projects I did as lead designer of media for the team: rendering a model of the Astrobotic moon lander that would carry the Moonark. Below shows the plan for the Peregrine lander’s journey, set to take place in the summer of 2021.
I received a package CAD files containing the over 600 different types of parts that make up the lander, and used these to create the final assembly.
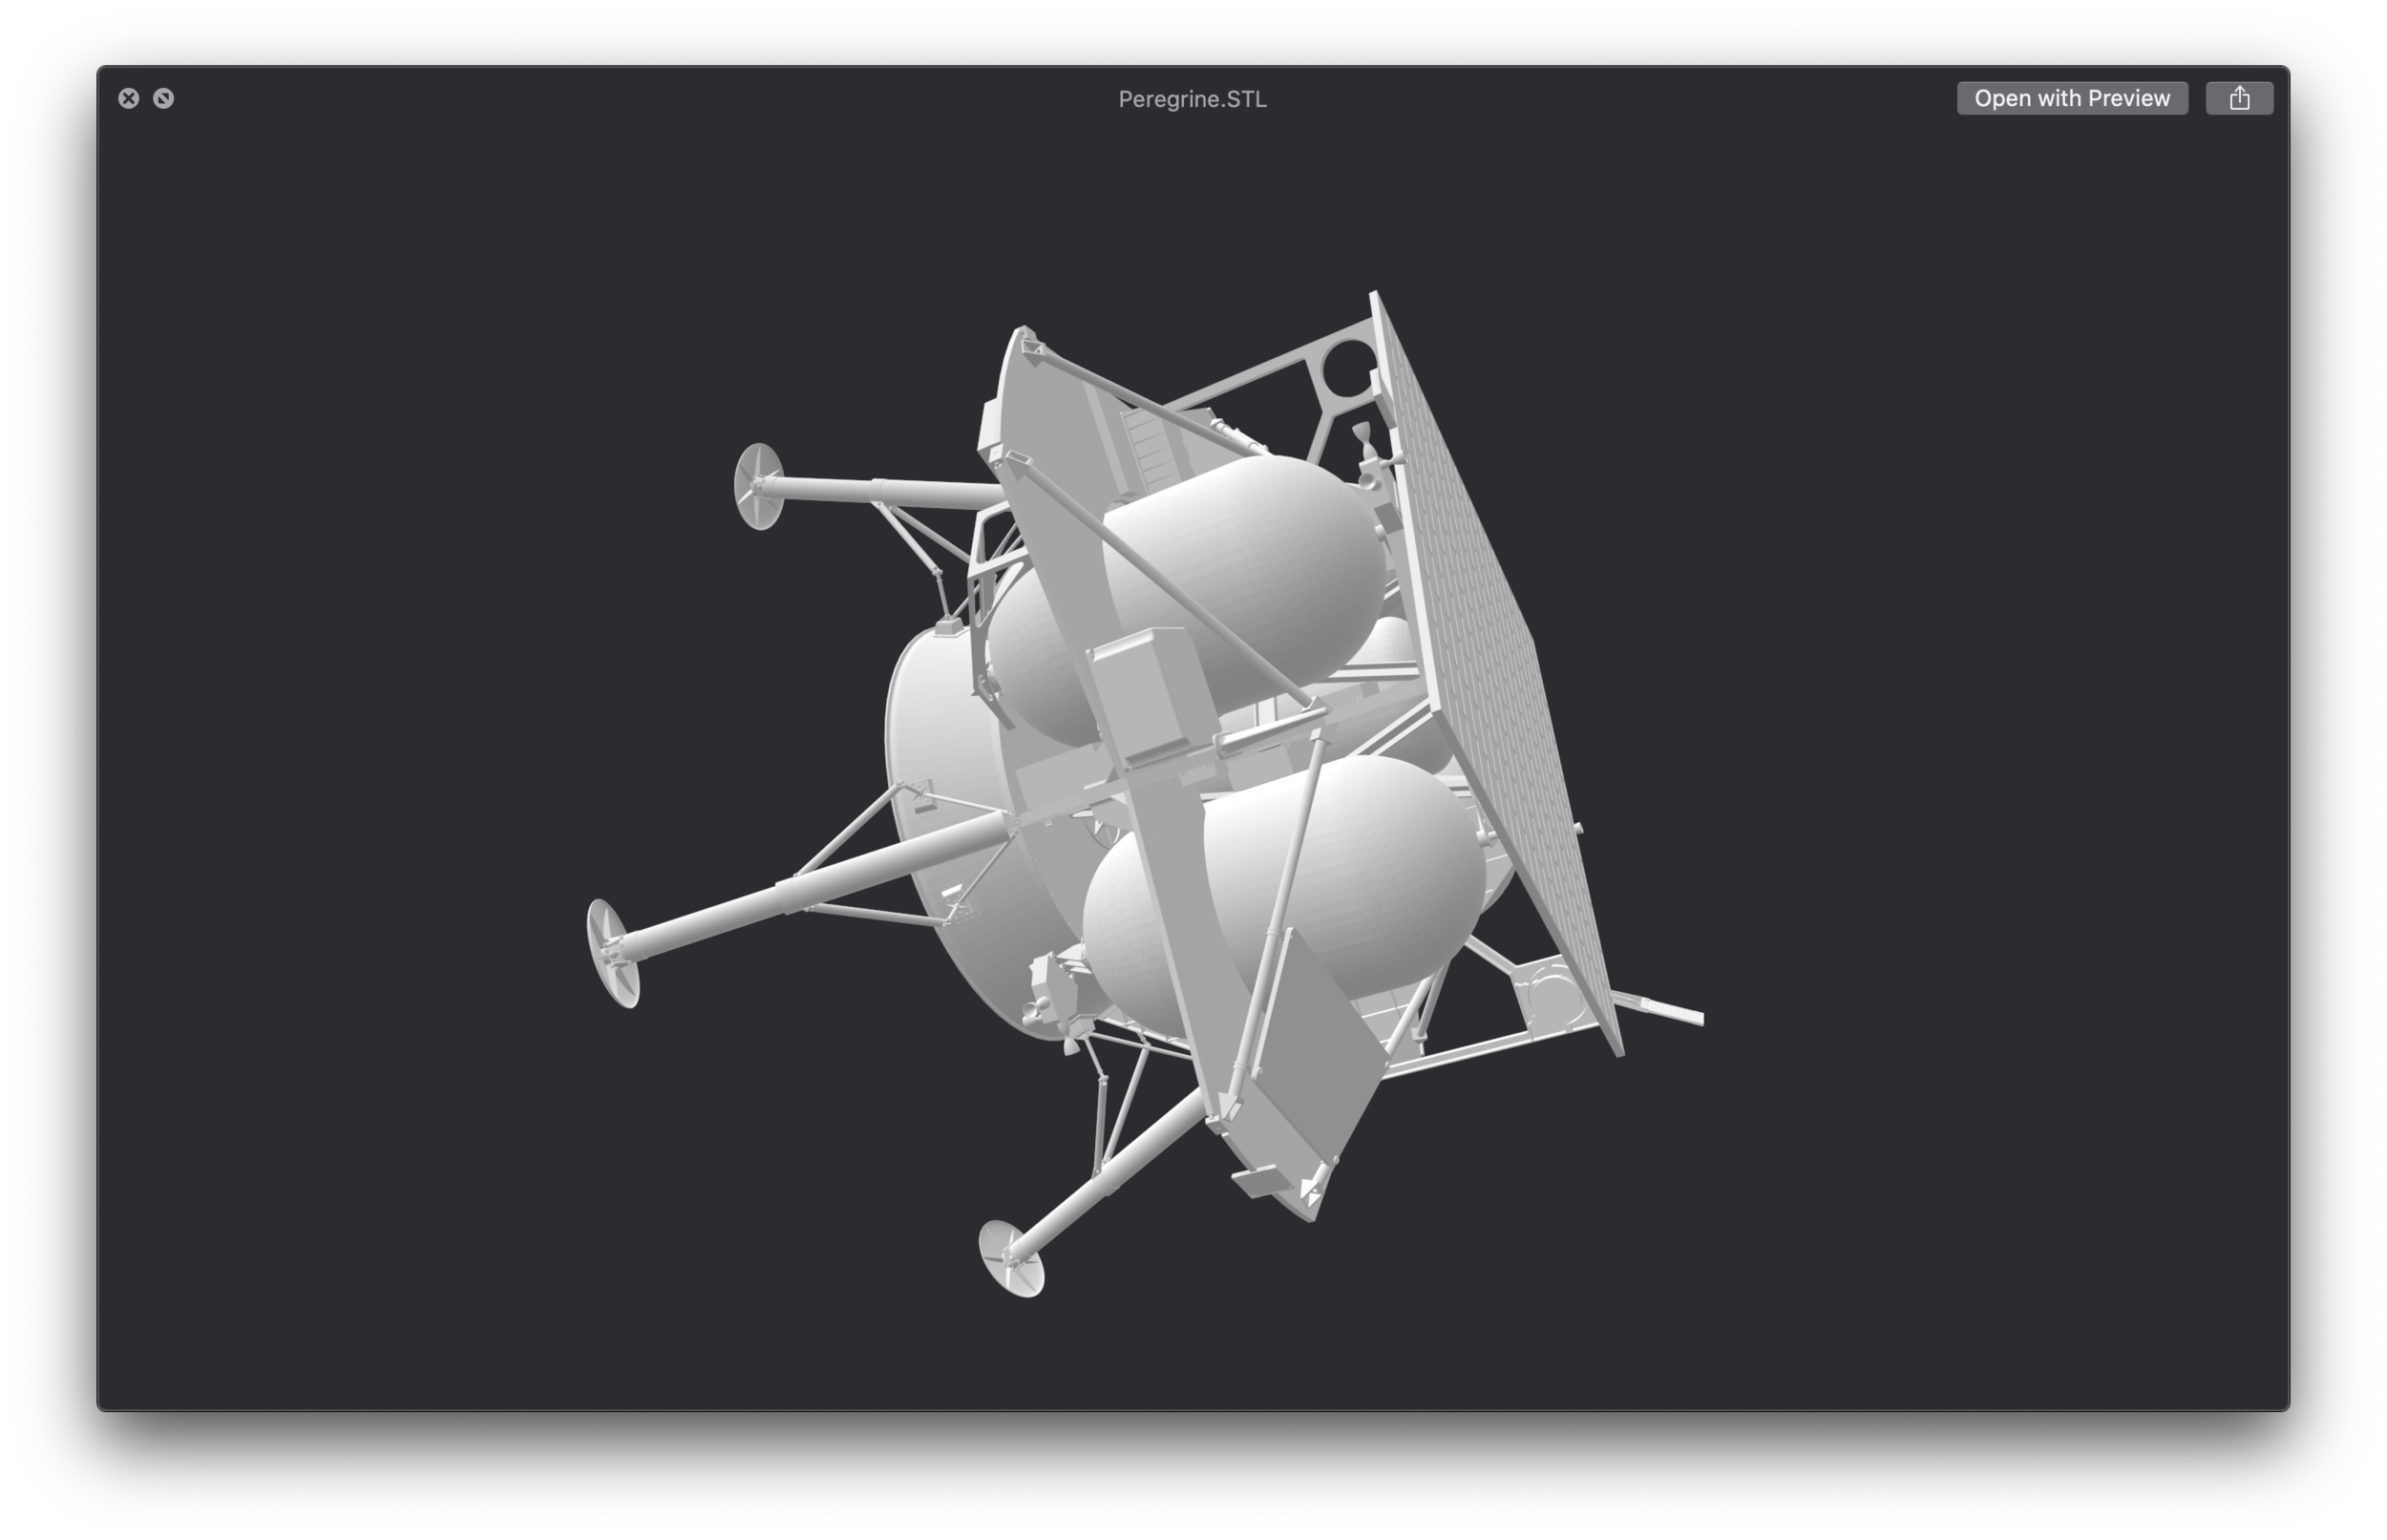

After completing the labor-intensive task of learning about how the lander works and assembling the complex model of it, my next task was to render its color and material characteristics. I wasn’t provided any guide by Astrobotic directly, so I based my renderings on a previous iteration of the lander that was pictured on their website.
I chose a darker polished steel look for the main structure of the lander, and used a couple different neutral tones such as a lighter, cool gray and tannish metals for the smaller functional/technological components fastened to the frame and payload deck. The above image provided good visual inspiration for the gold foil on the fuel tanks and similar gold tones on the upper part of the legs of the lander, as well as the color and material characteristics of the solar panel on top. Finally, I added in the model of the Moonark, which I had previously rendered for the website.


Once the model was complete, I placed it in various virtual lighting environments to get a sense of how light cast over the lander would affect its appearance. This helped me make final adjustments to the color tones and reflectivity of the metals I was using in the rendering. After making the rendering below, I decided to brighten the gold foil on the tanks and legs, as well as the small silver-toned fasteners that affix supports to the frame.
Final Lander Renderings - Assets for Website
Below is a selection of final images of the lander I produced primarily for the Moonark website, but also made available for press releases about the project. These were rendered against a plain white background to match the Main Menu page on the website. This neutral background also serves to highlight the features of the lander and the Moonark, which in these images is shown in the correct position on the lander.
Lander Animation
In addition to the images, I also spent a considerable amount of time producing a short video showing the Peregrine Lander’s journey to the moon. This gave me an opportunity to contextualize the model in different environments, and visualize how it will move through space and settle in its final destination. This animation has appeared in a number of promotional videos and press releases, and as the launch date approaches, it is likely to be featured even more.
This animation was much more complex than anything I had done previously, which were simple product animations showing exploded views, or an object changing orientation in place. The first shot of the lander in the warehouse on earth was an exciting example of this, as the camera rotates around the stationary lander and zooms in on the Moonark. However, the rest of the shots are more dynamic, as the lander moves through space, enters and exists the frame, and goes backward and forward in perspective. Simulating these complex motions accurately required that I learn much more about the capabilities of the software.
Exhibition Concept
In November 2018 I was given the opportunity to accompany the Moonark team to the New Worlds Space Innovation & Enterprise Conference in Austin, Texas. The founding members of the project were invited to give a presentation and panel discussion about the project, focusing on the innovative art and technology behind the Moonark, and the massive collaborative effort that made it possible.
In addition to the presentation, the Moonark was displayed at a booth in the conference hall. Below is the exhibition materials we brought with us, consisting of the Moonark itself, a few printouts with supporting material, and the primary displays: two large wooden panels surveying the contents of the four chambers. After a few days showing the project this way—knowing that there would be many exhibitions to come— we decided that it was time to totally overhaul the traveling display.
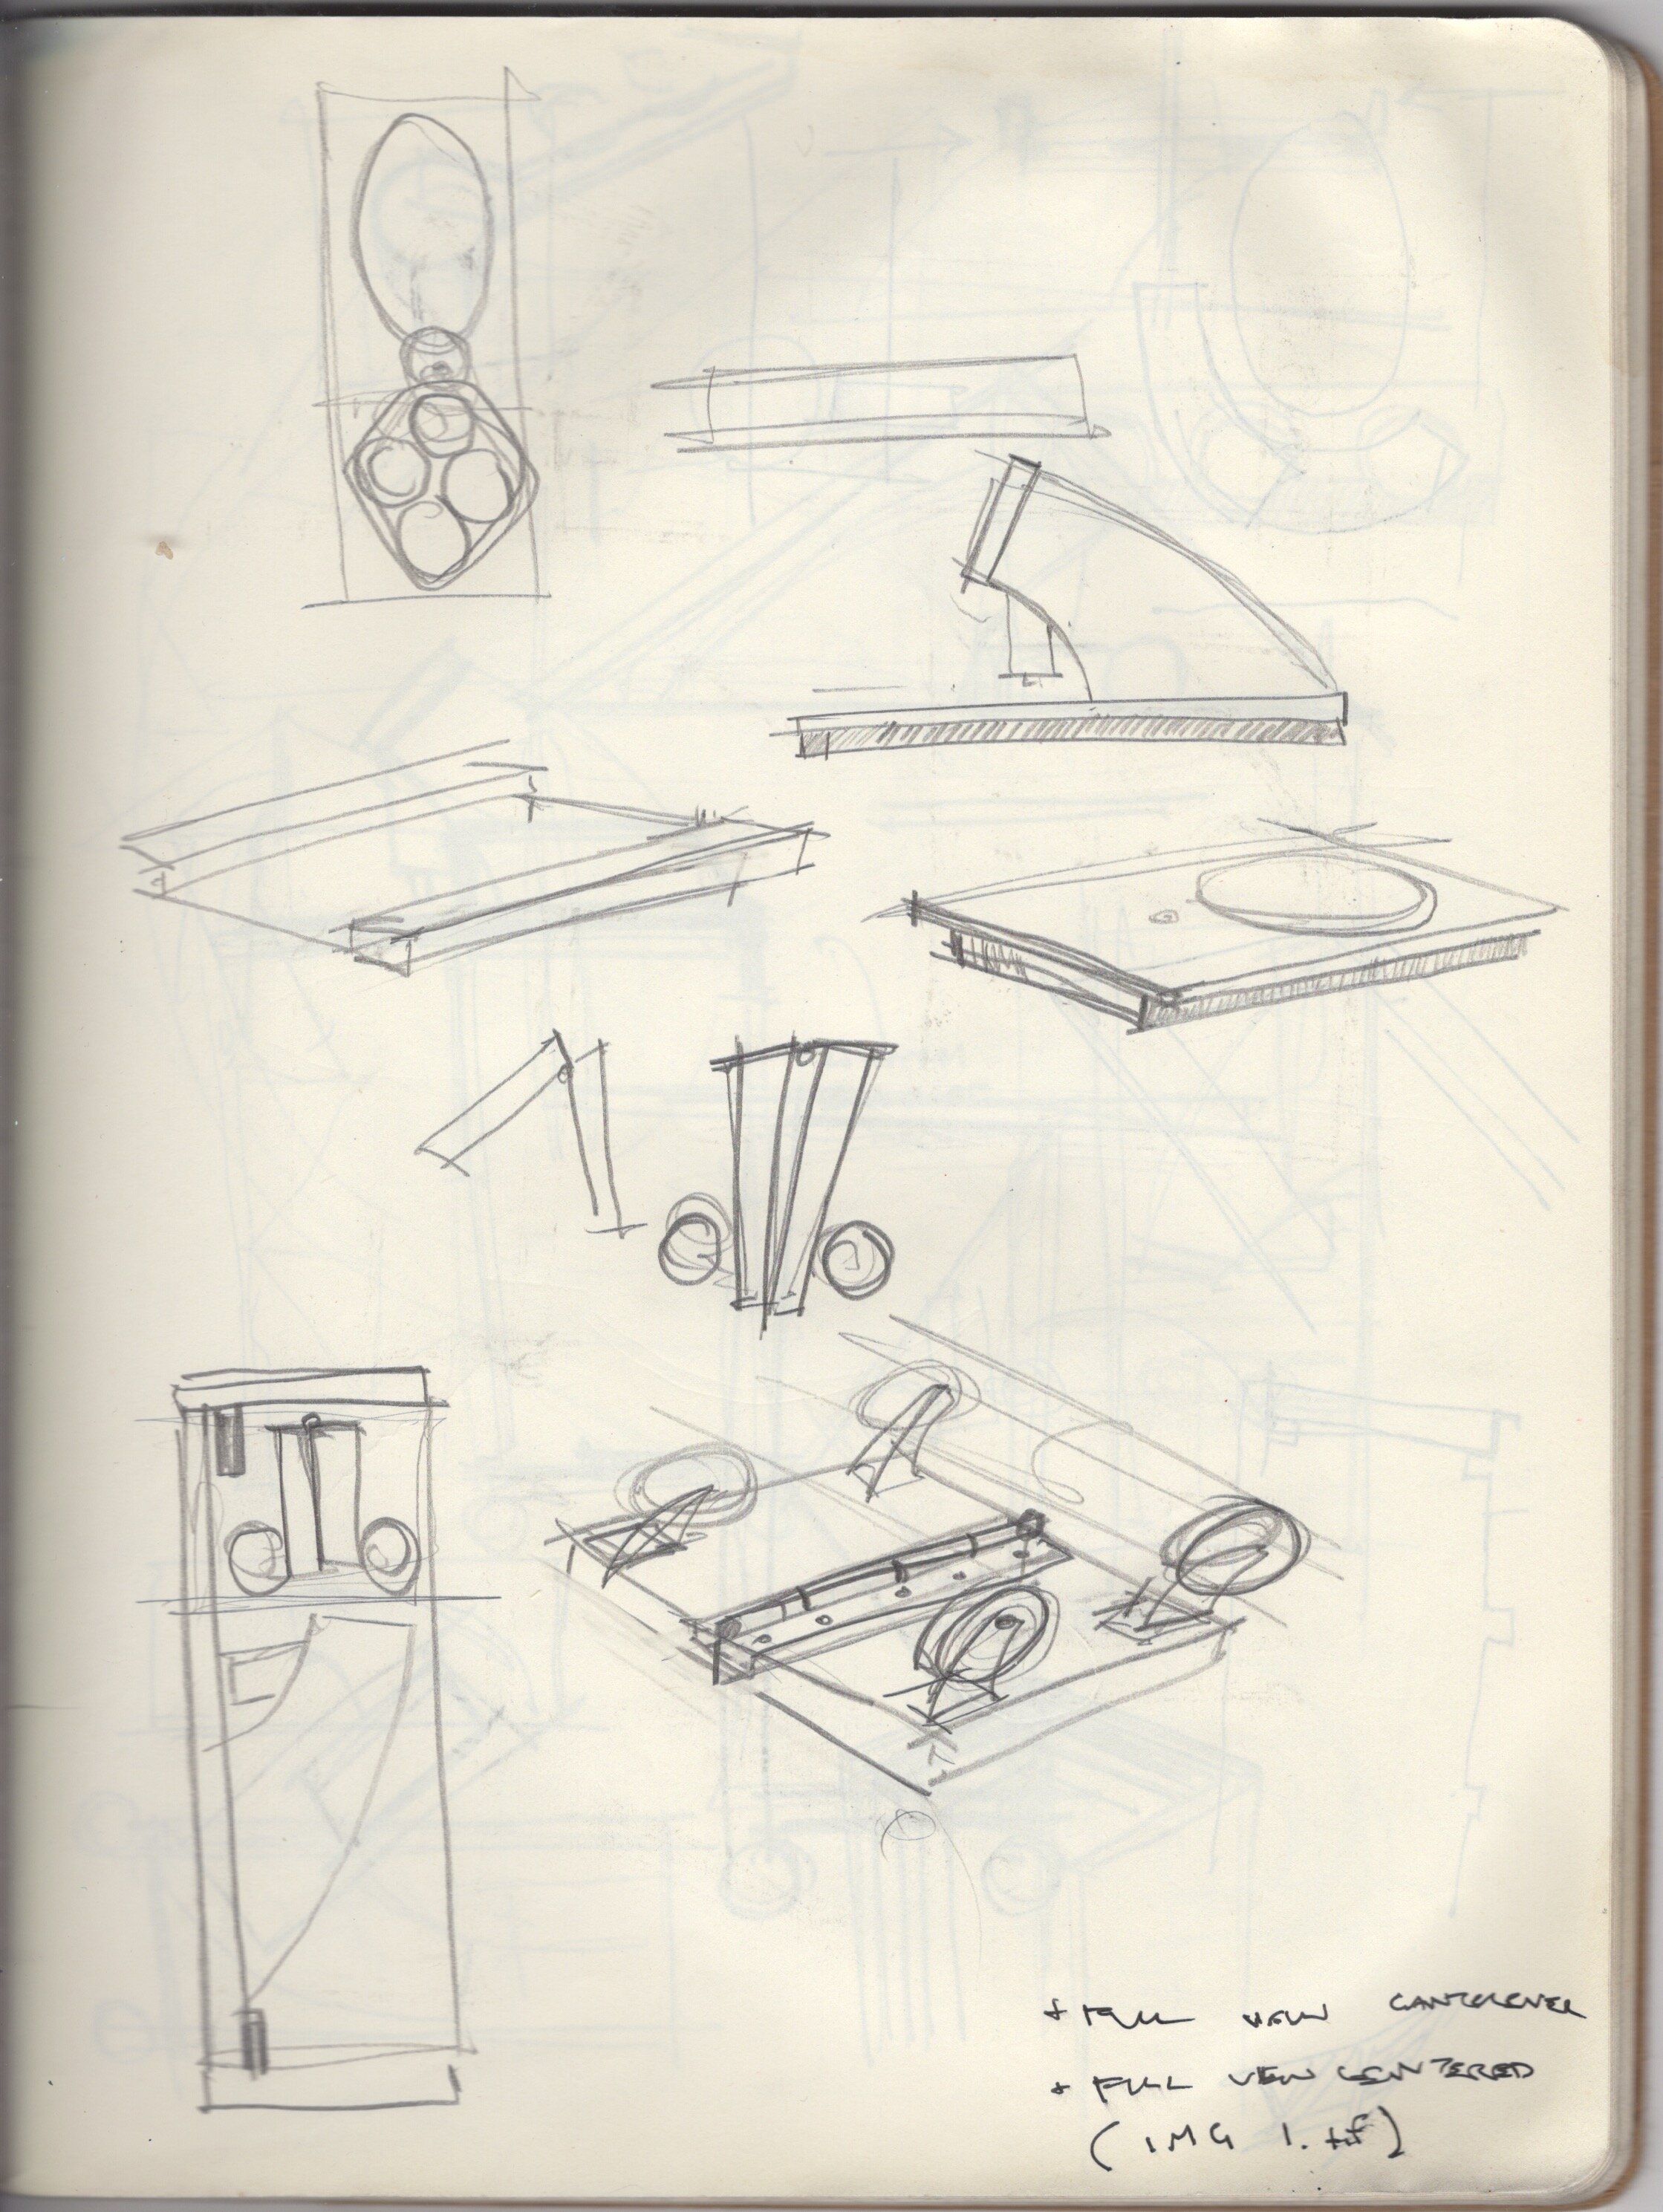
After returning from the conference I took the initiative of brainstorming about different forms the exhibitions could take. These sketches cover a broad range of concepts: from larger, more elaborate installations that offer an immersive experience, to travel-friendly displays that streamline the previous panels we had used.
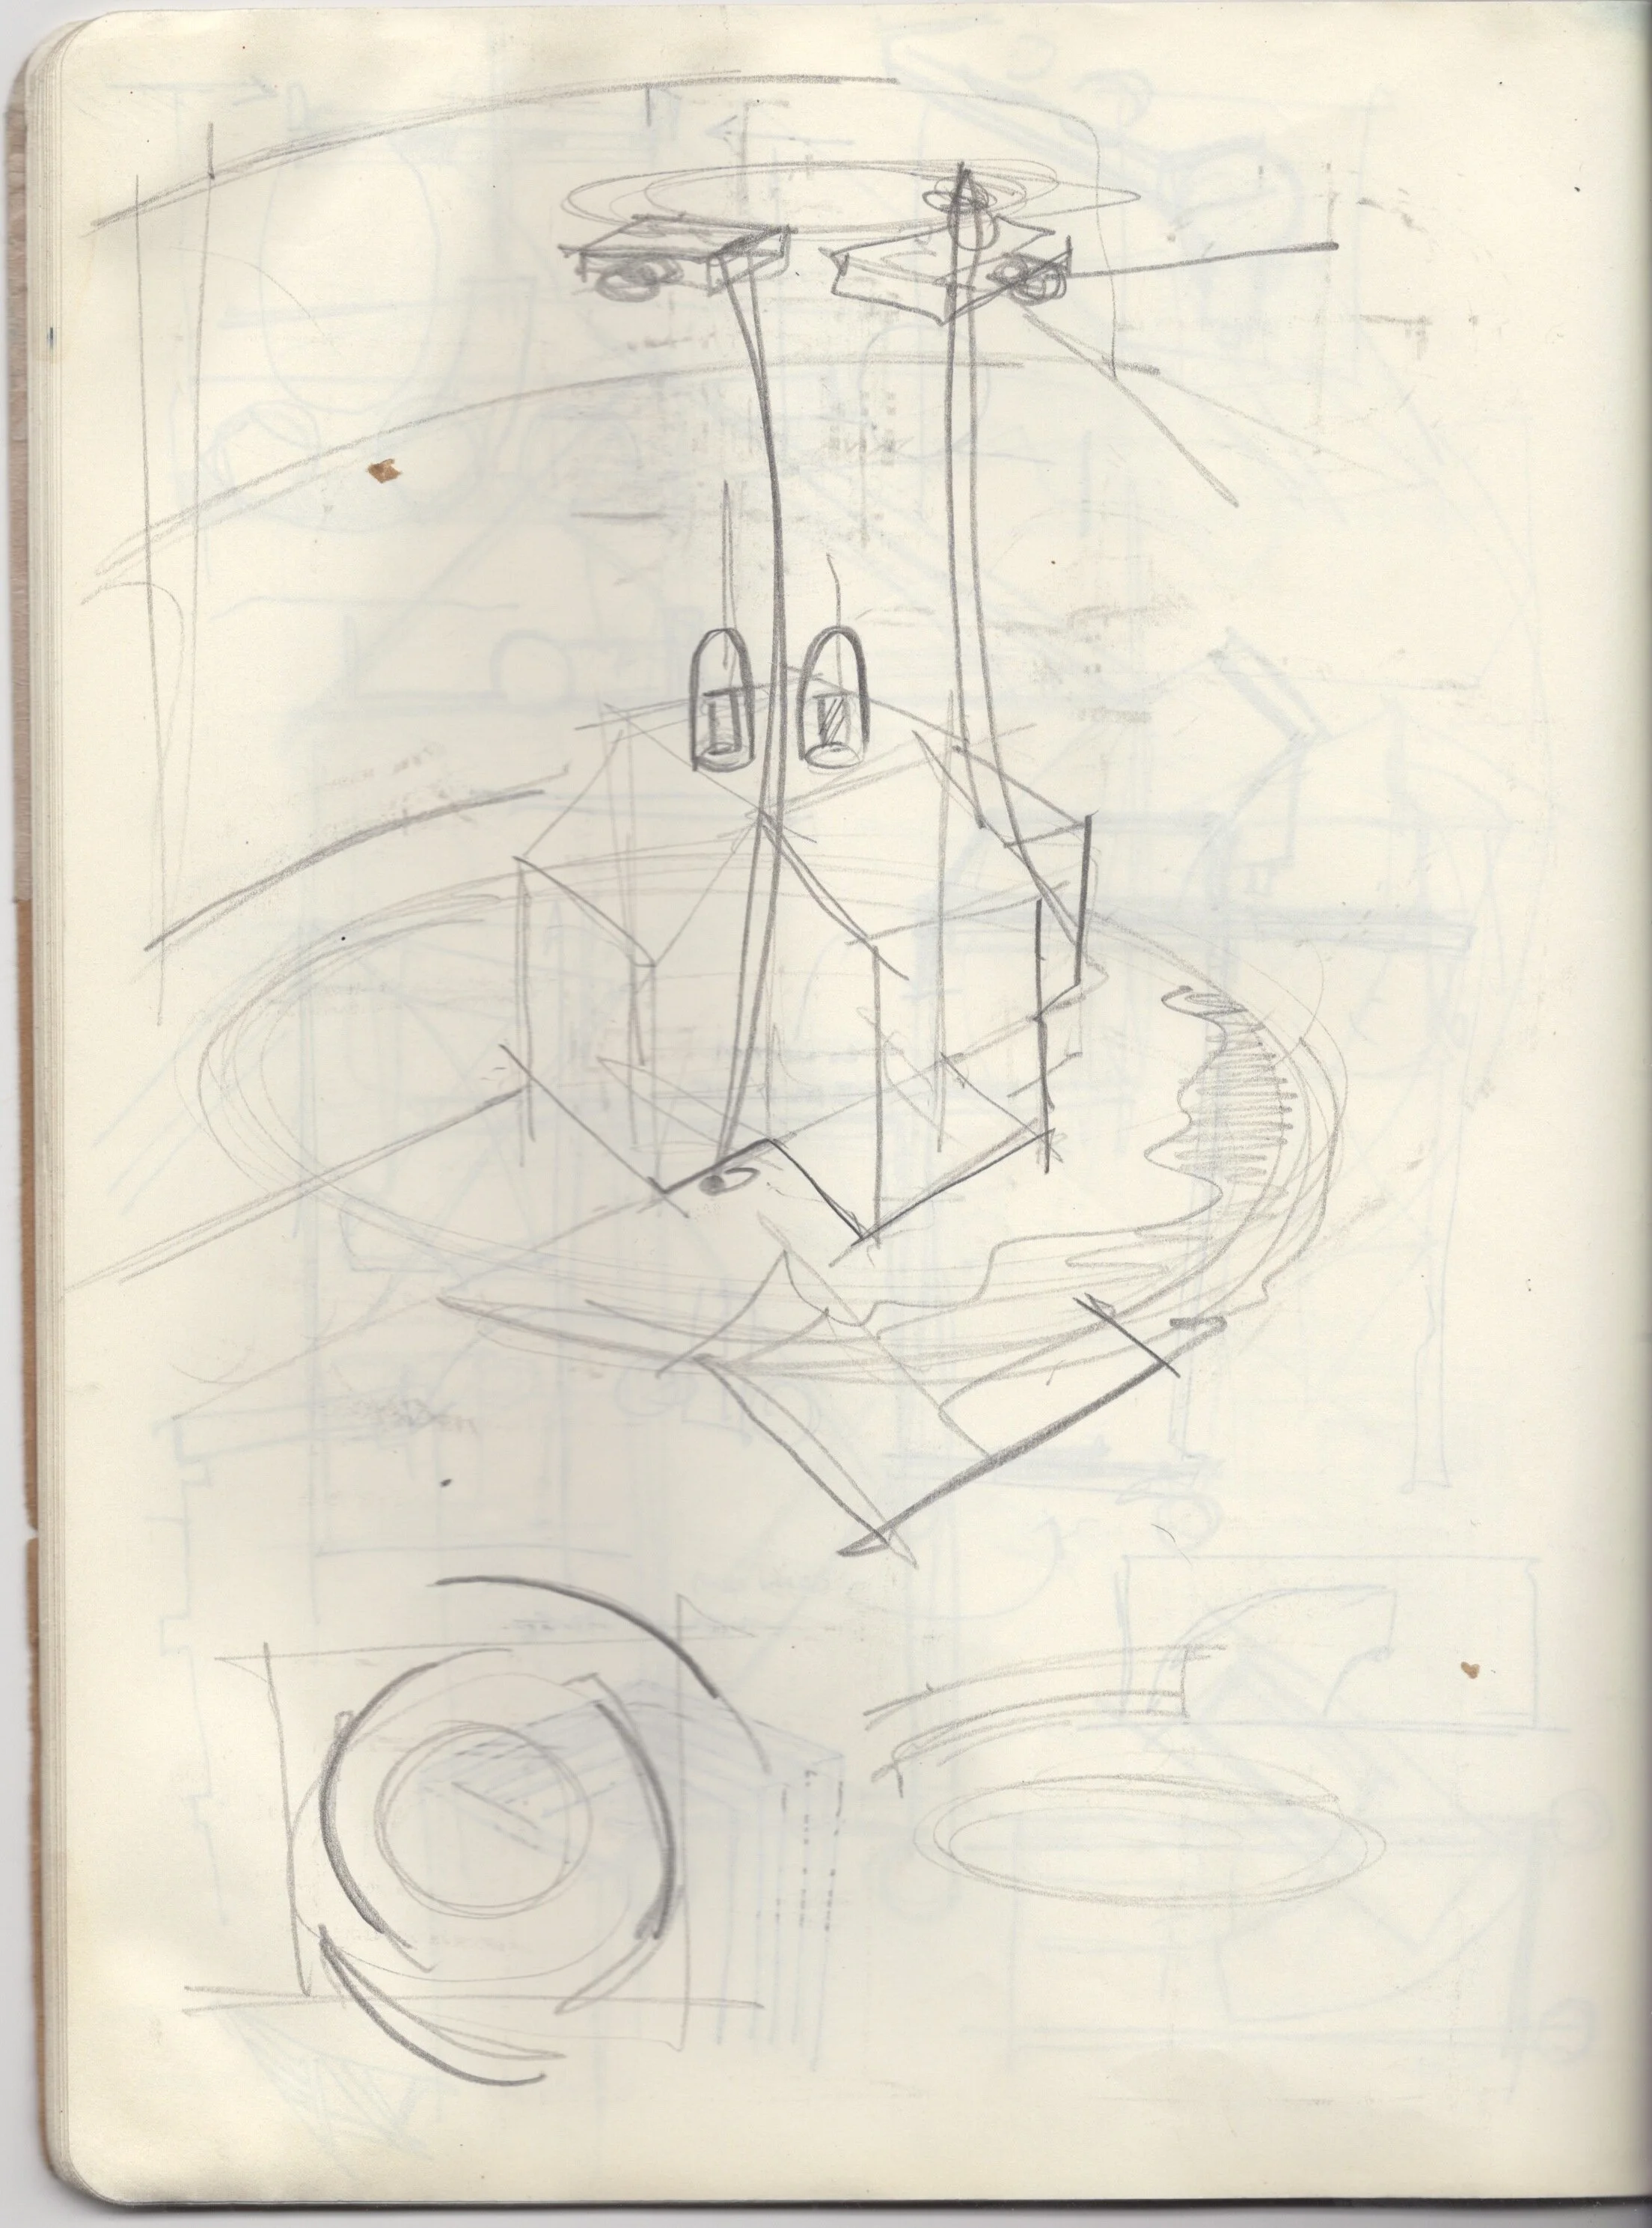
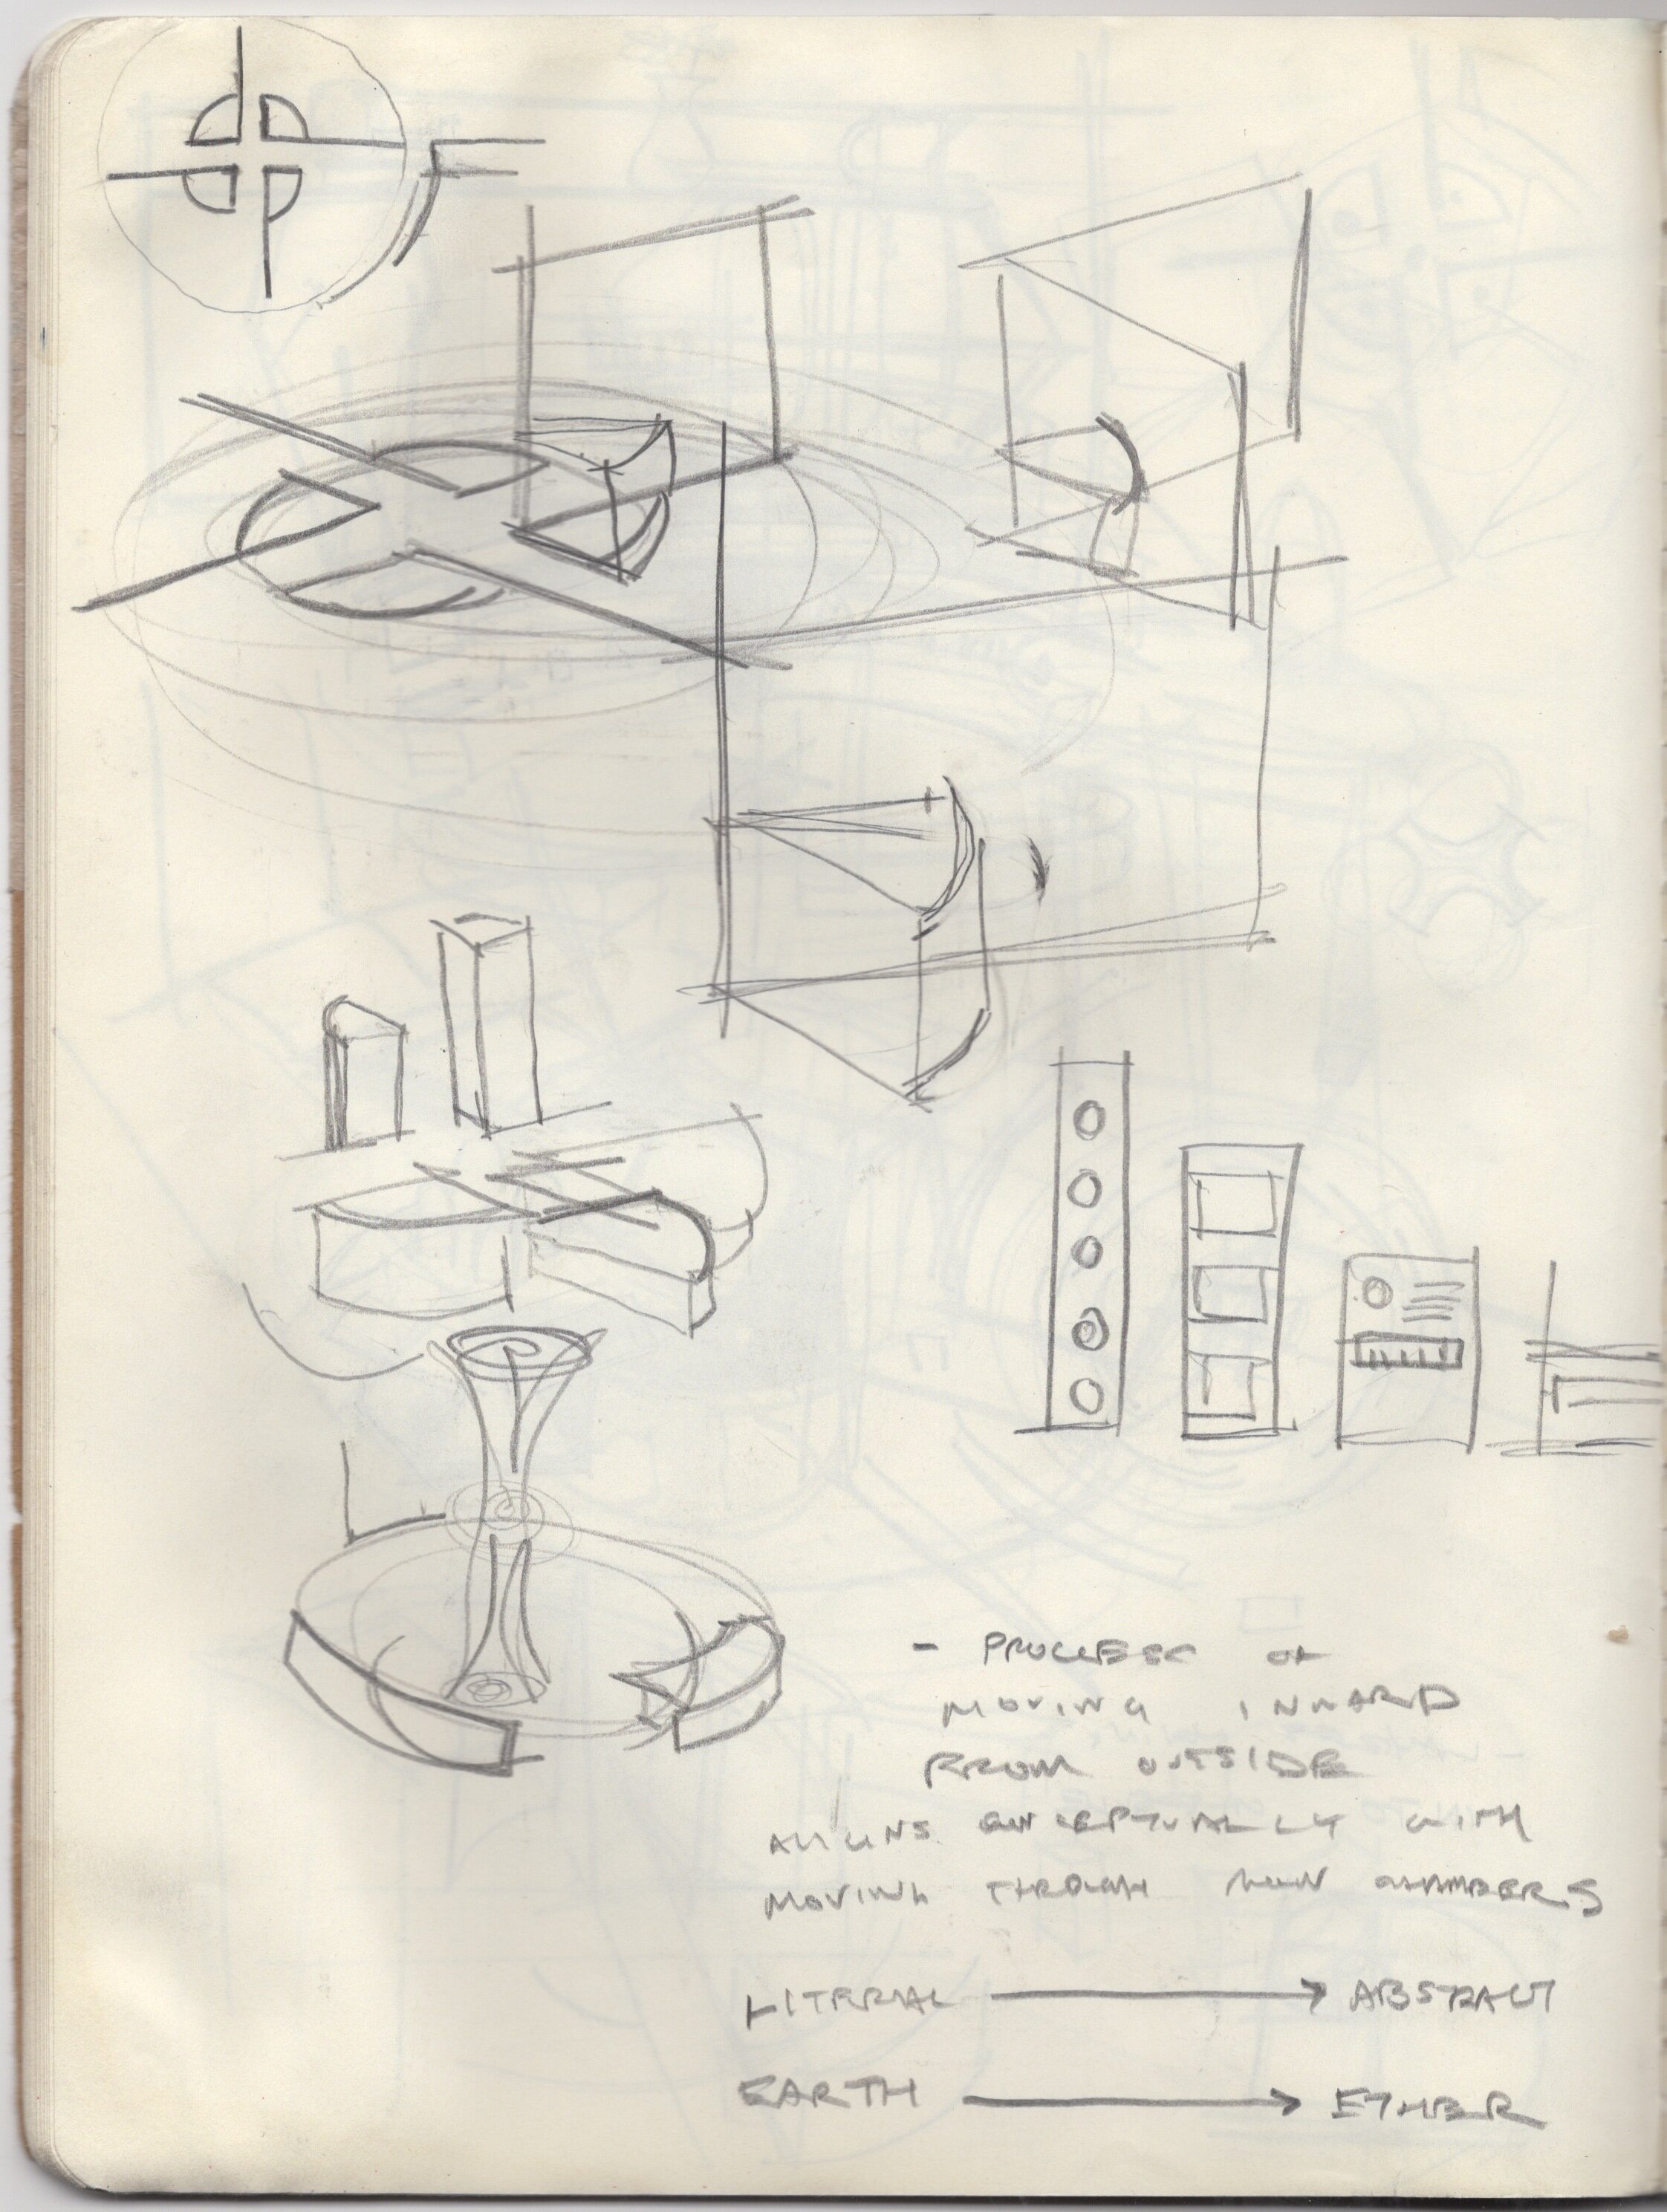
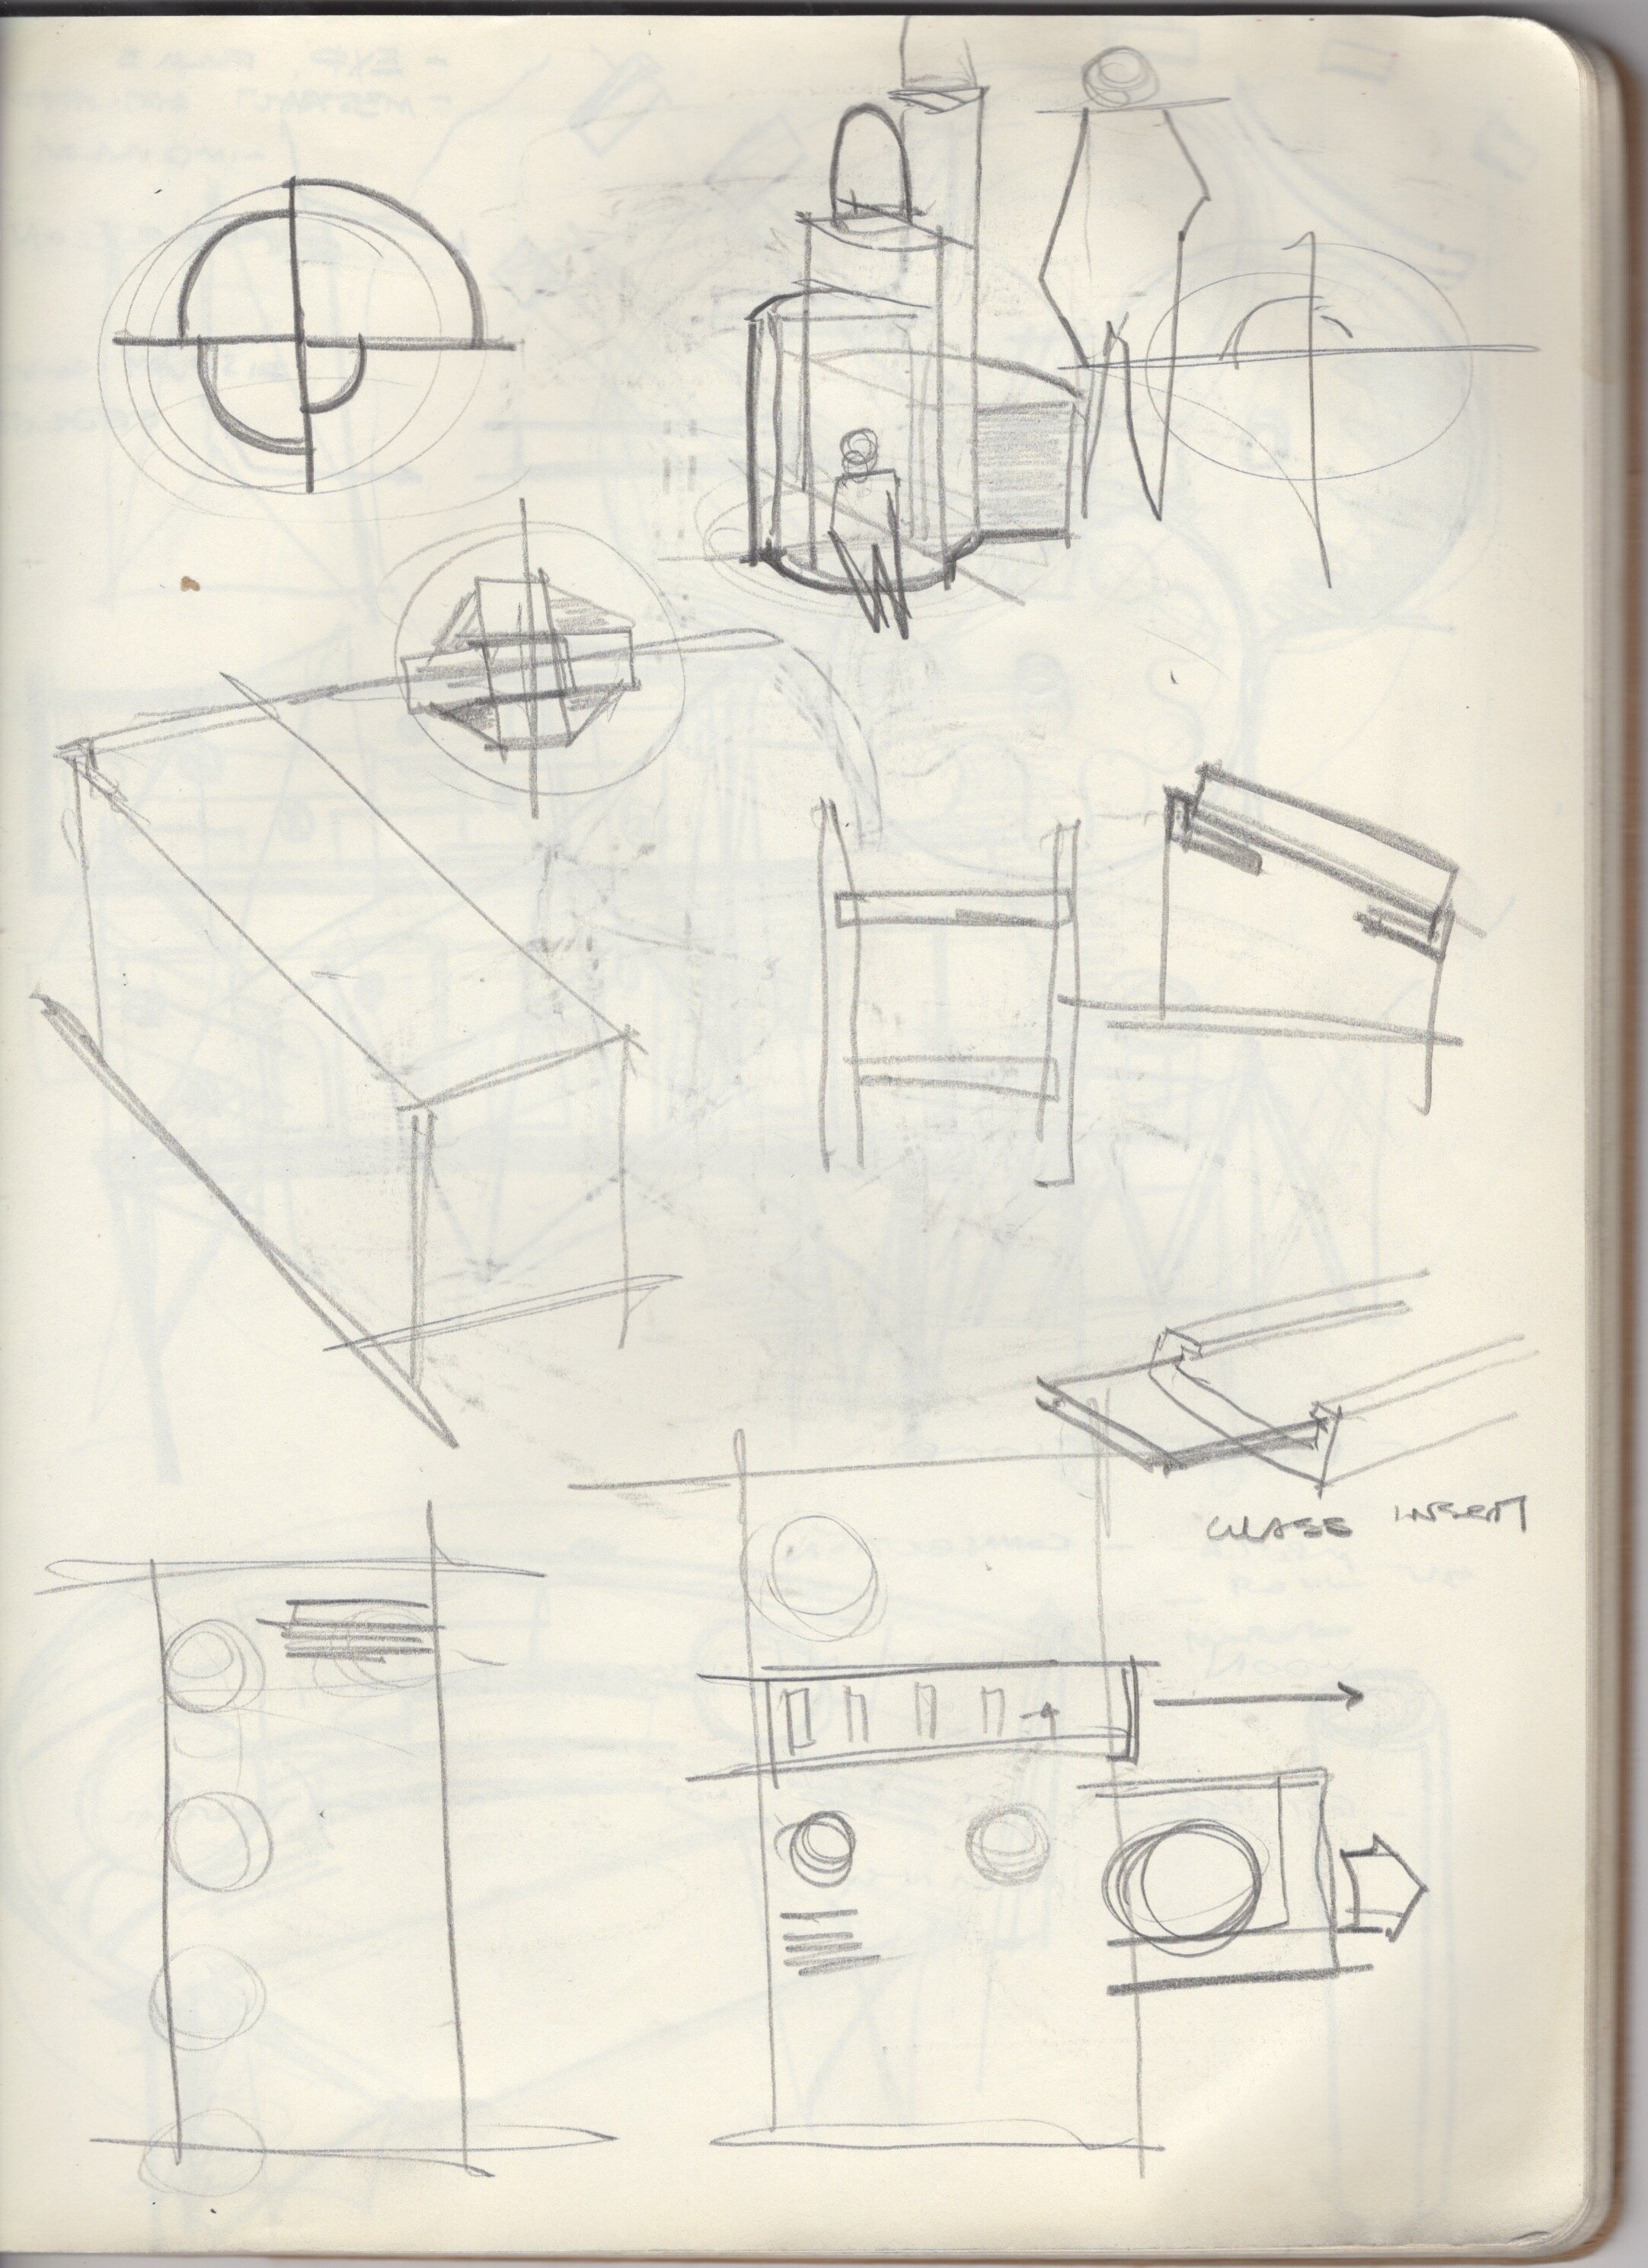
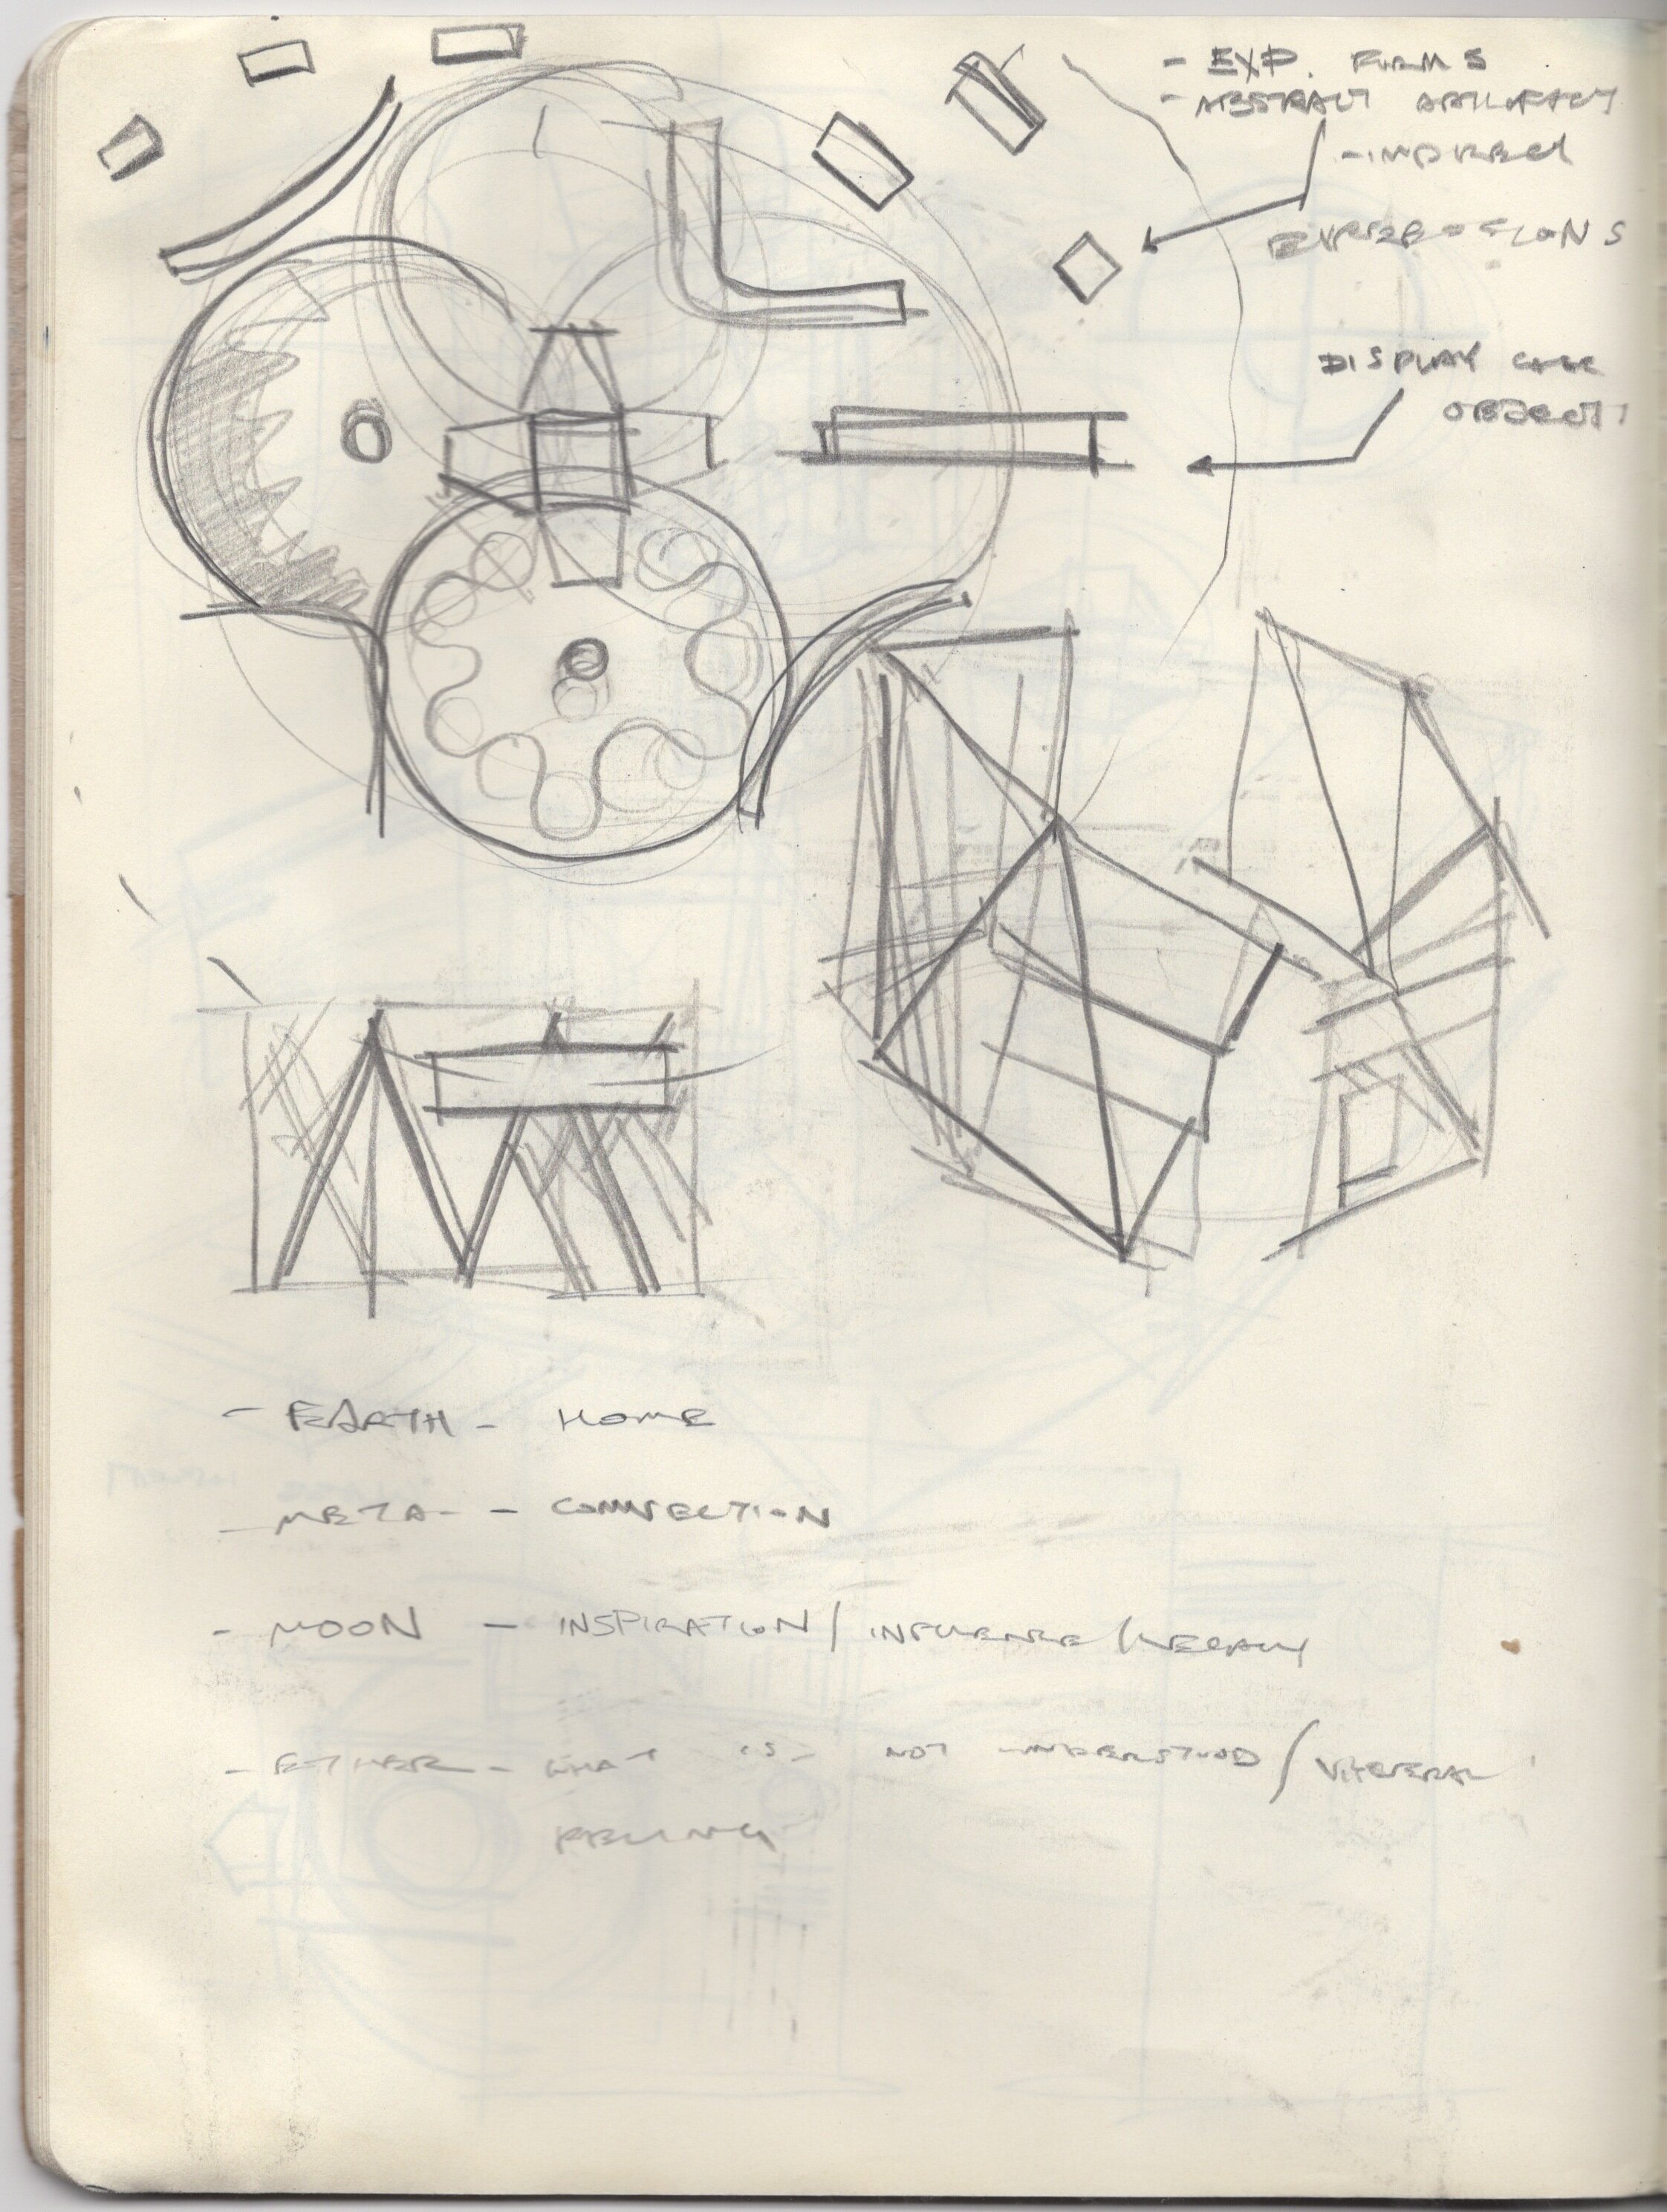

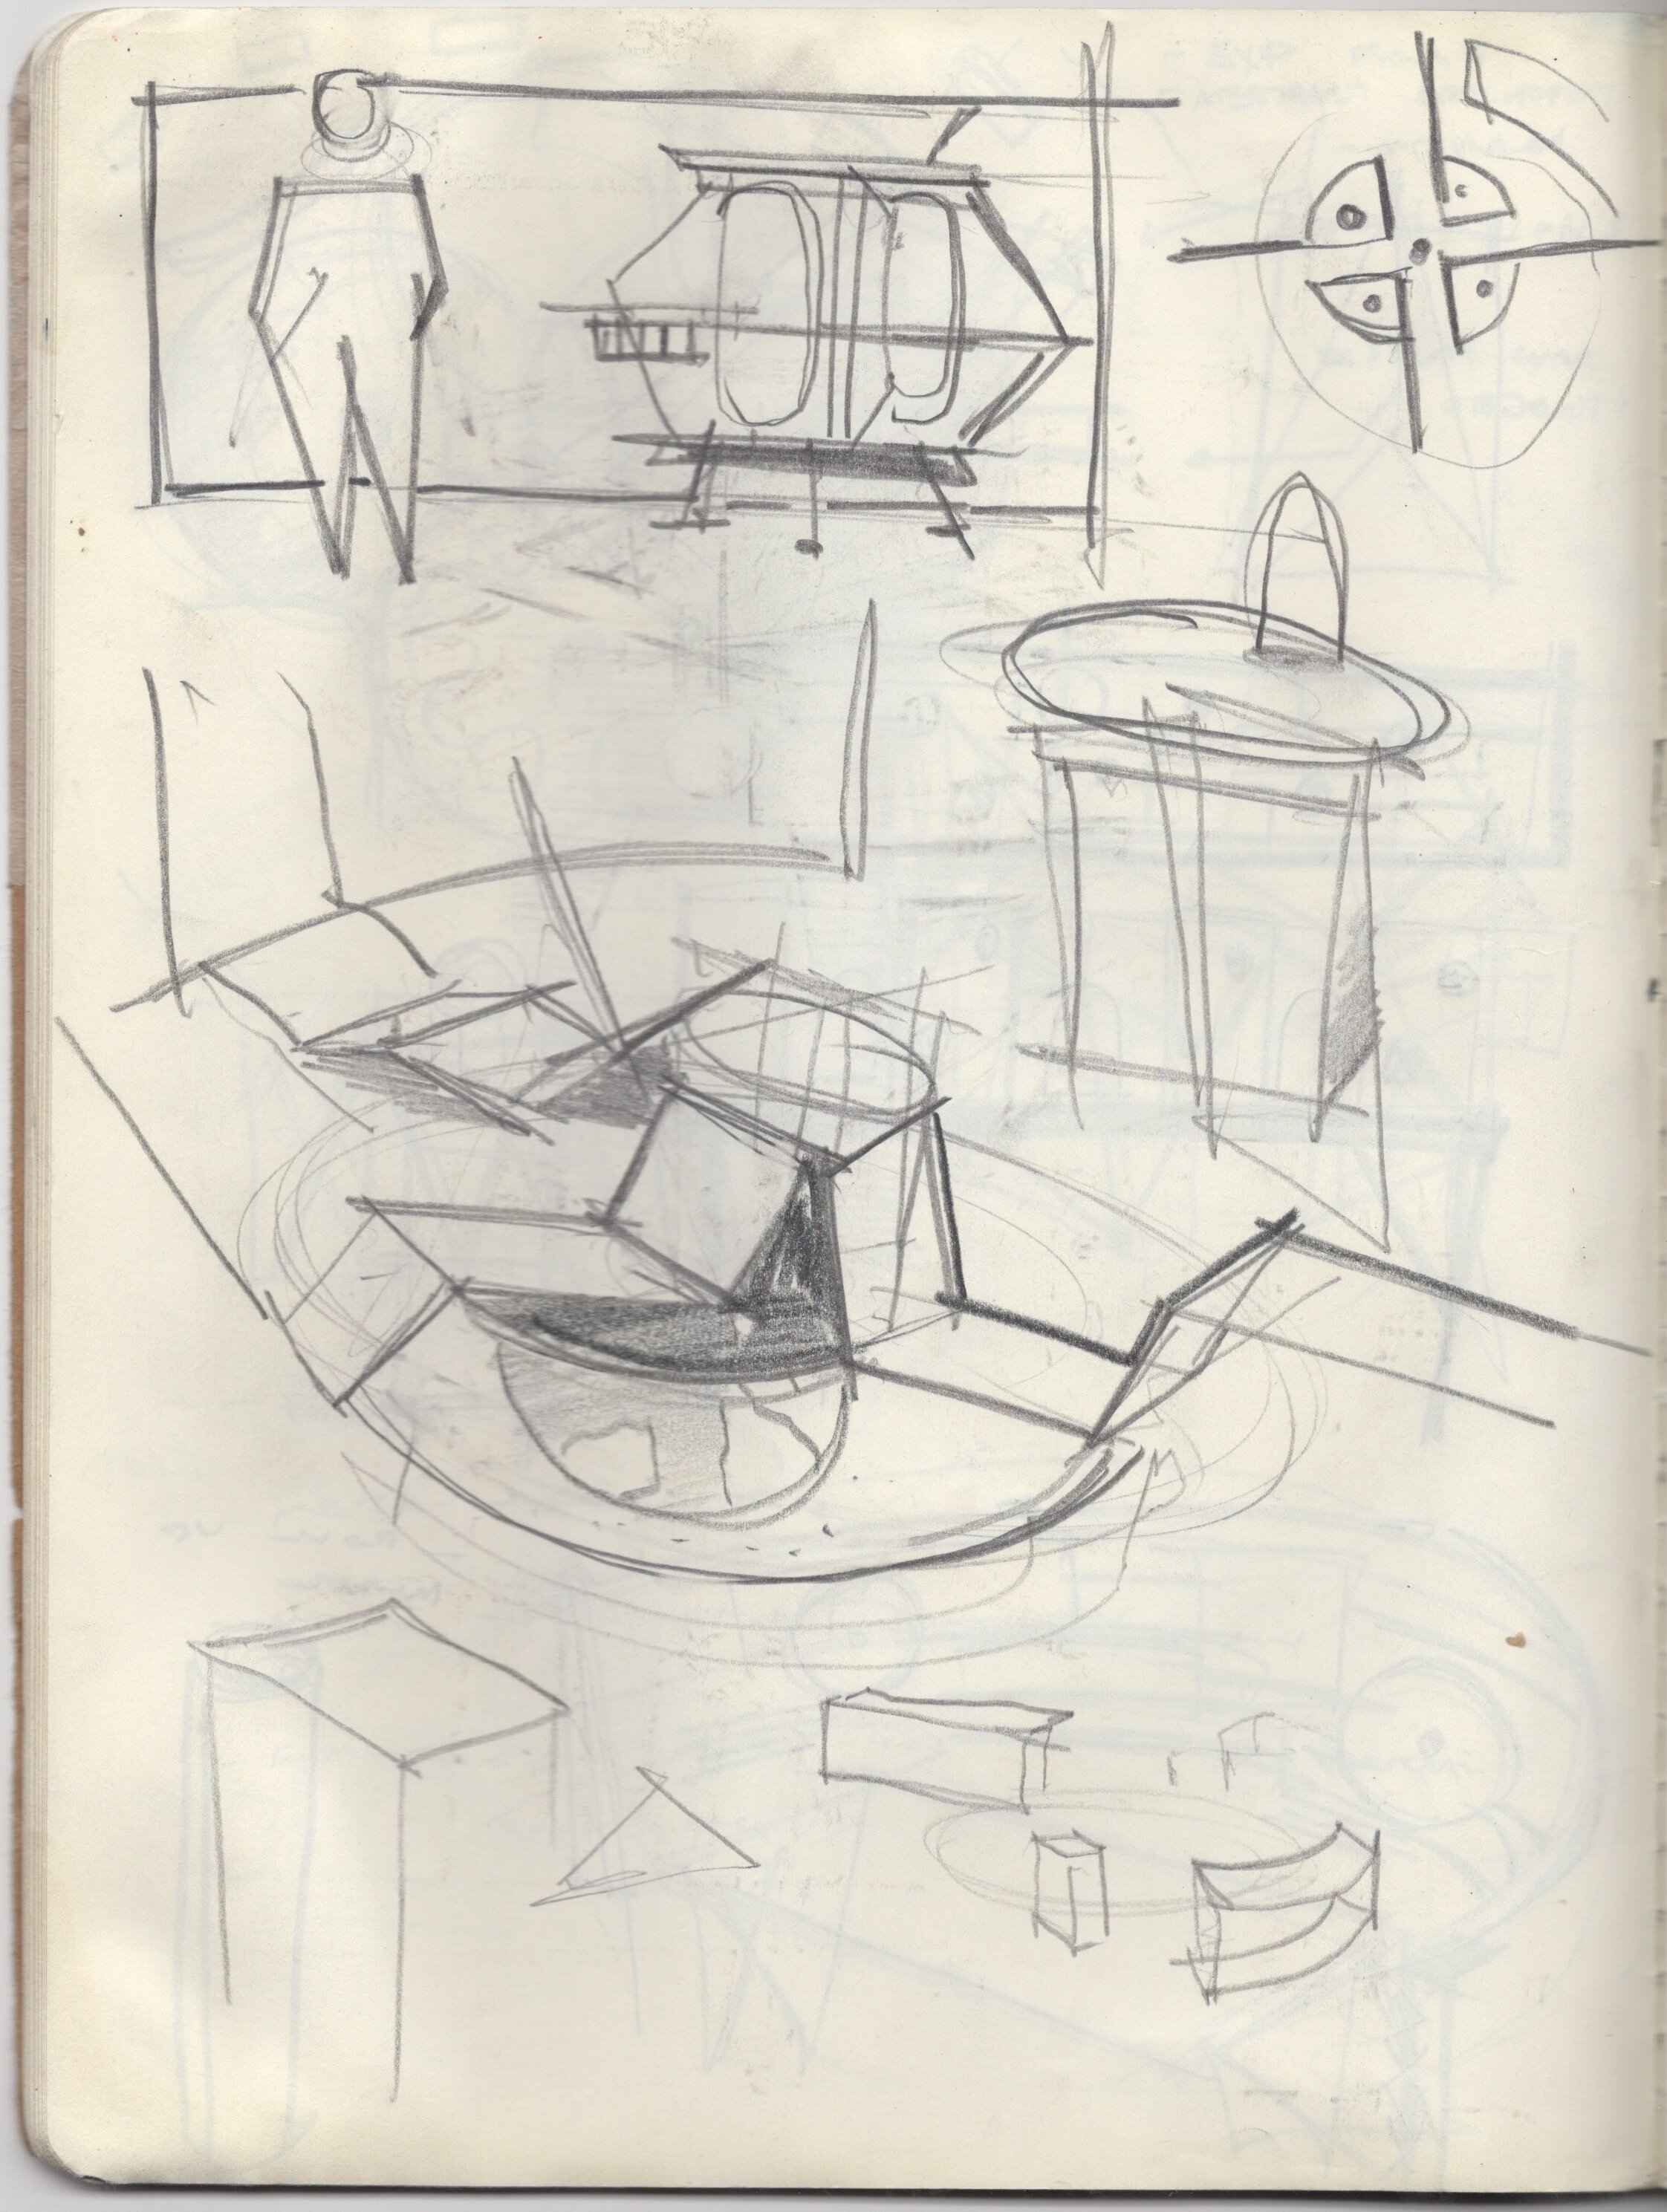
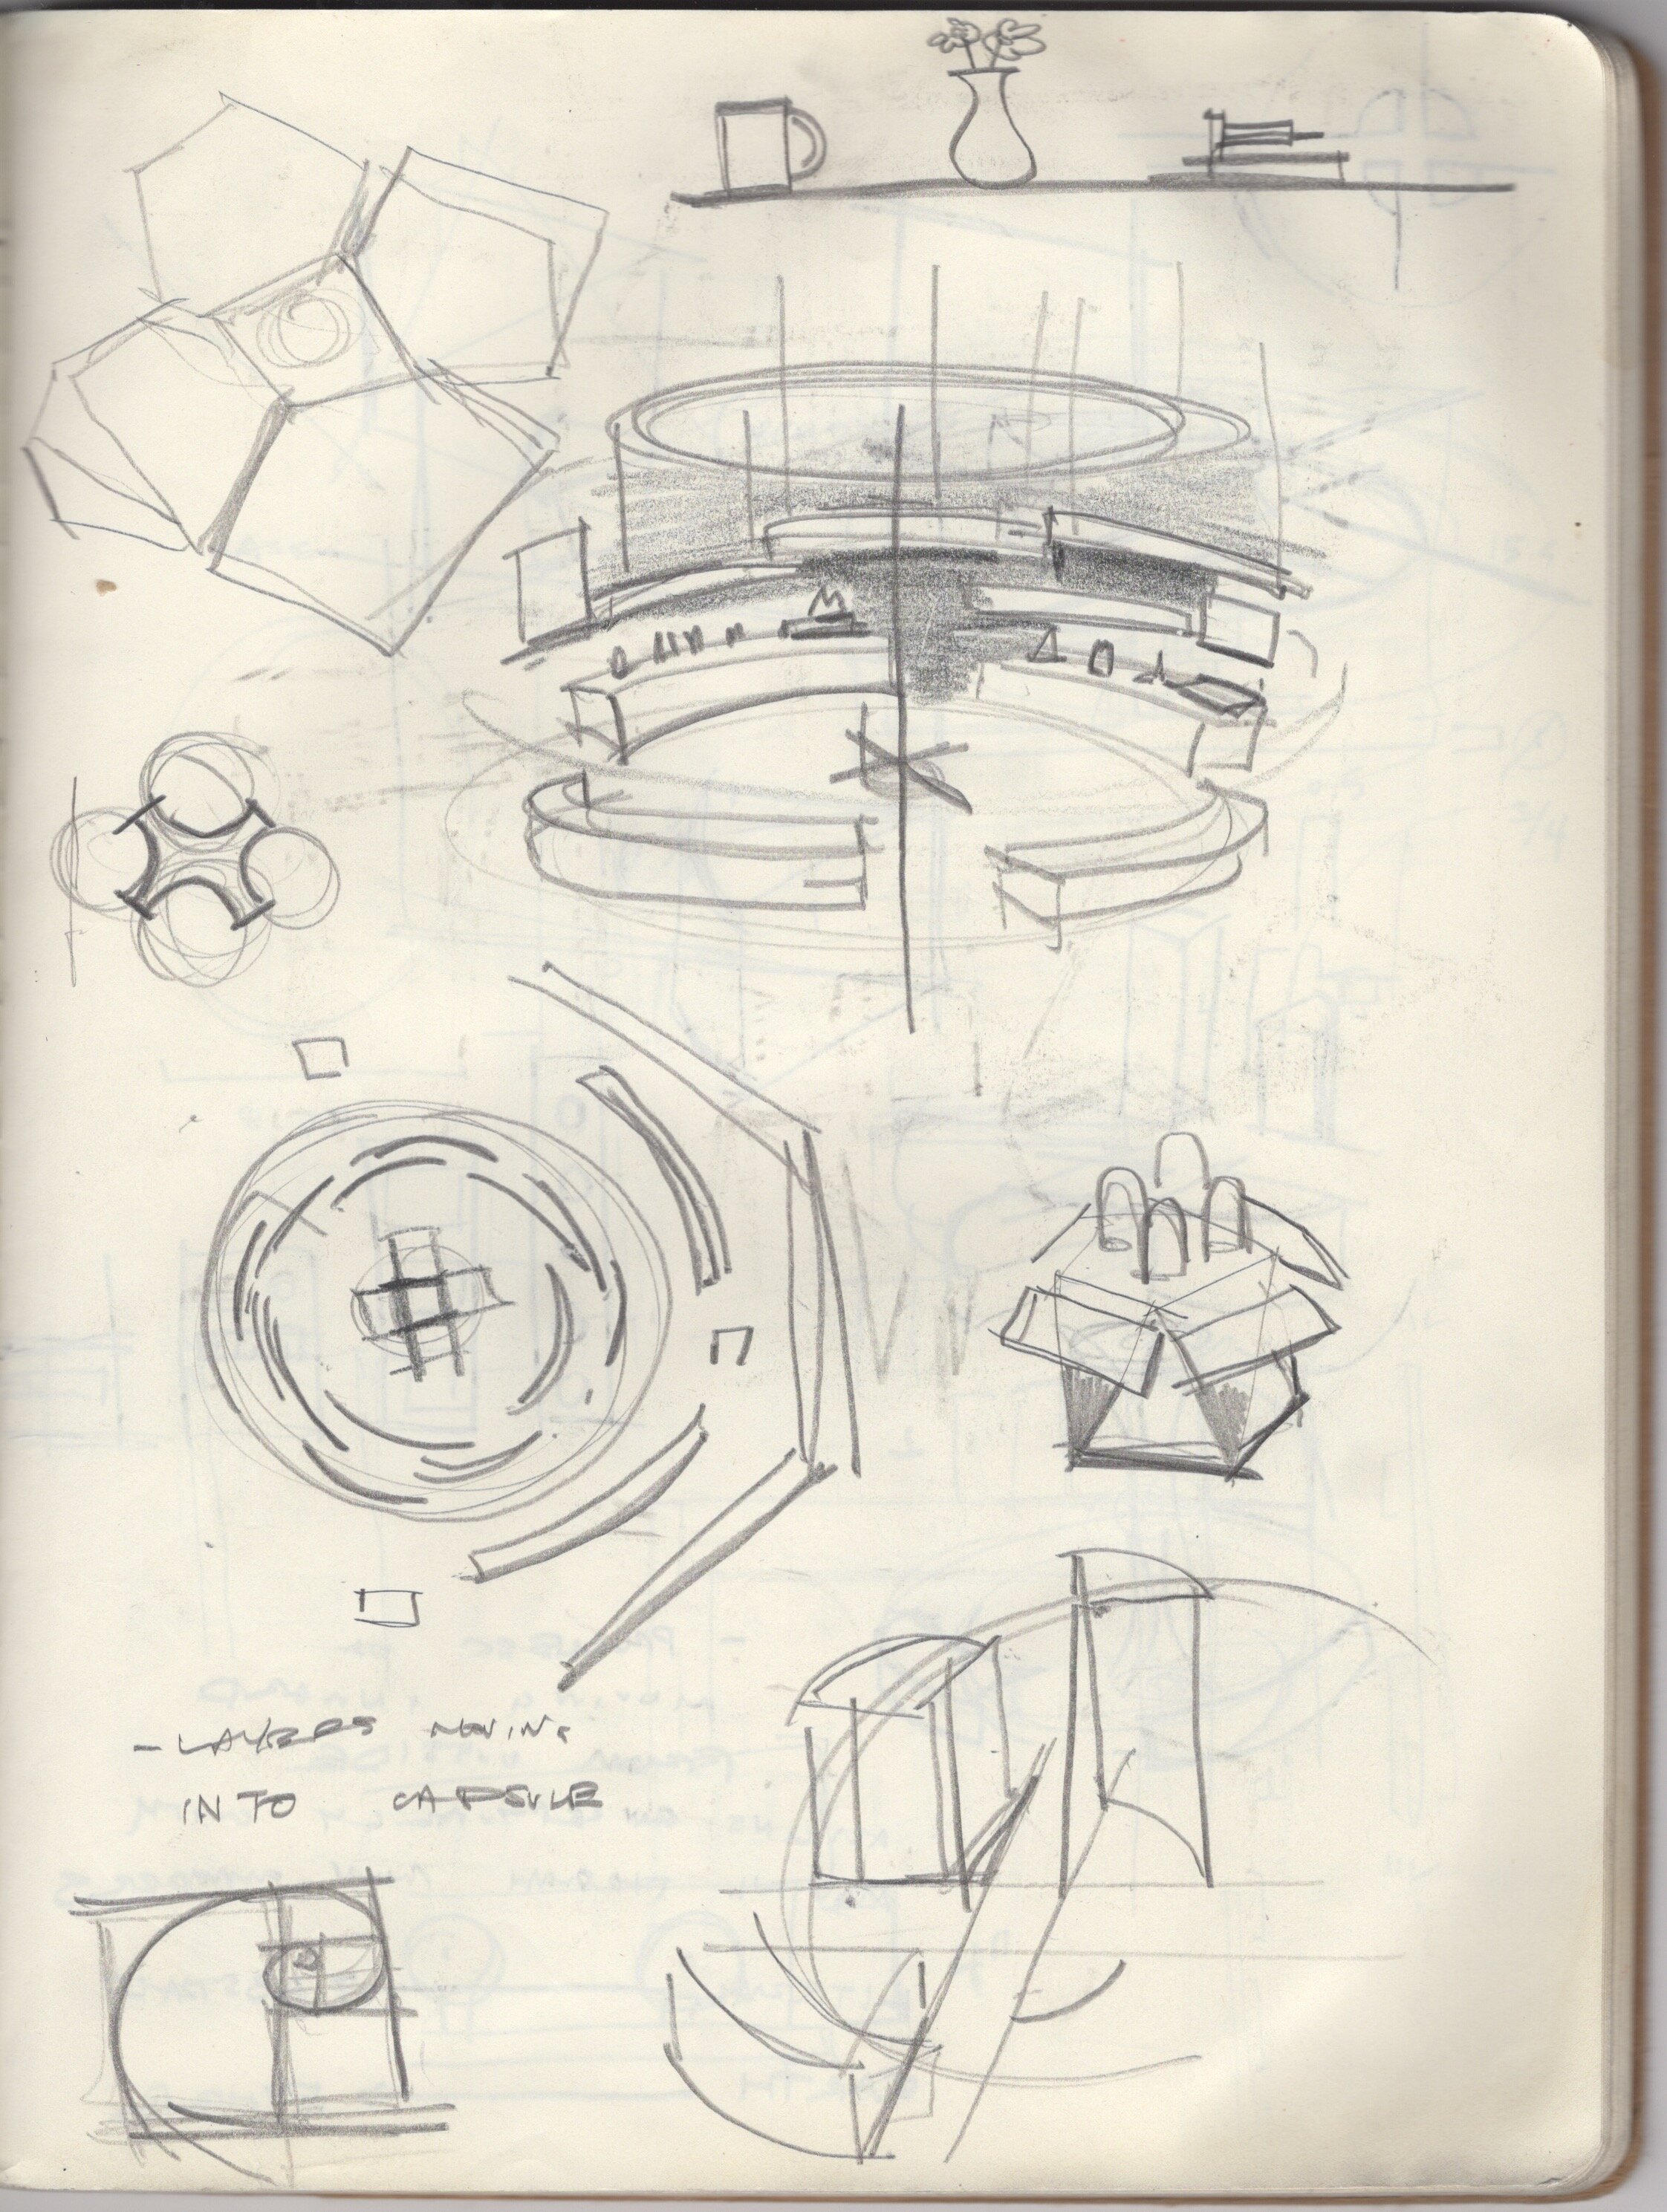
Upon further discussion, the direction the team was most interested in pursuing was a self-contained, traveling exhibition. Since we had both domestic and international exhibitions coming up, we developed an idea for exhibition materials with shipping crates that could be converted into portable display pedestals. On one would be a Wentzscope with a sliding carousel that would hold examples of the etched crystal discs in the Moonark. The other would be a large pedestal presenting the Moonark itself.
Designing the Disc Carousel
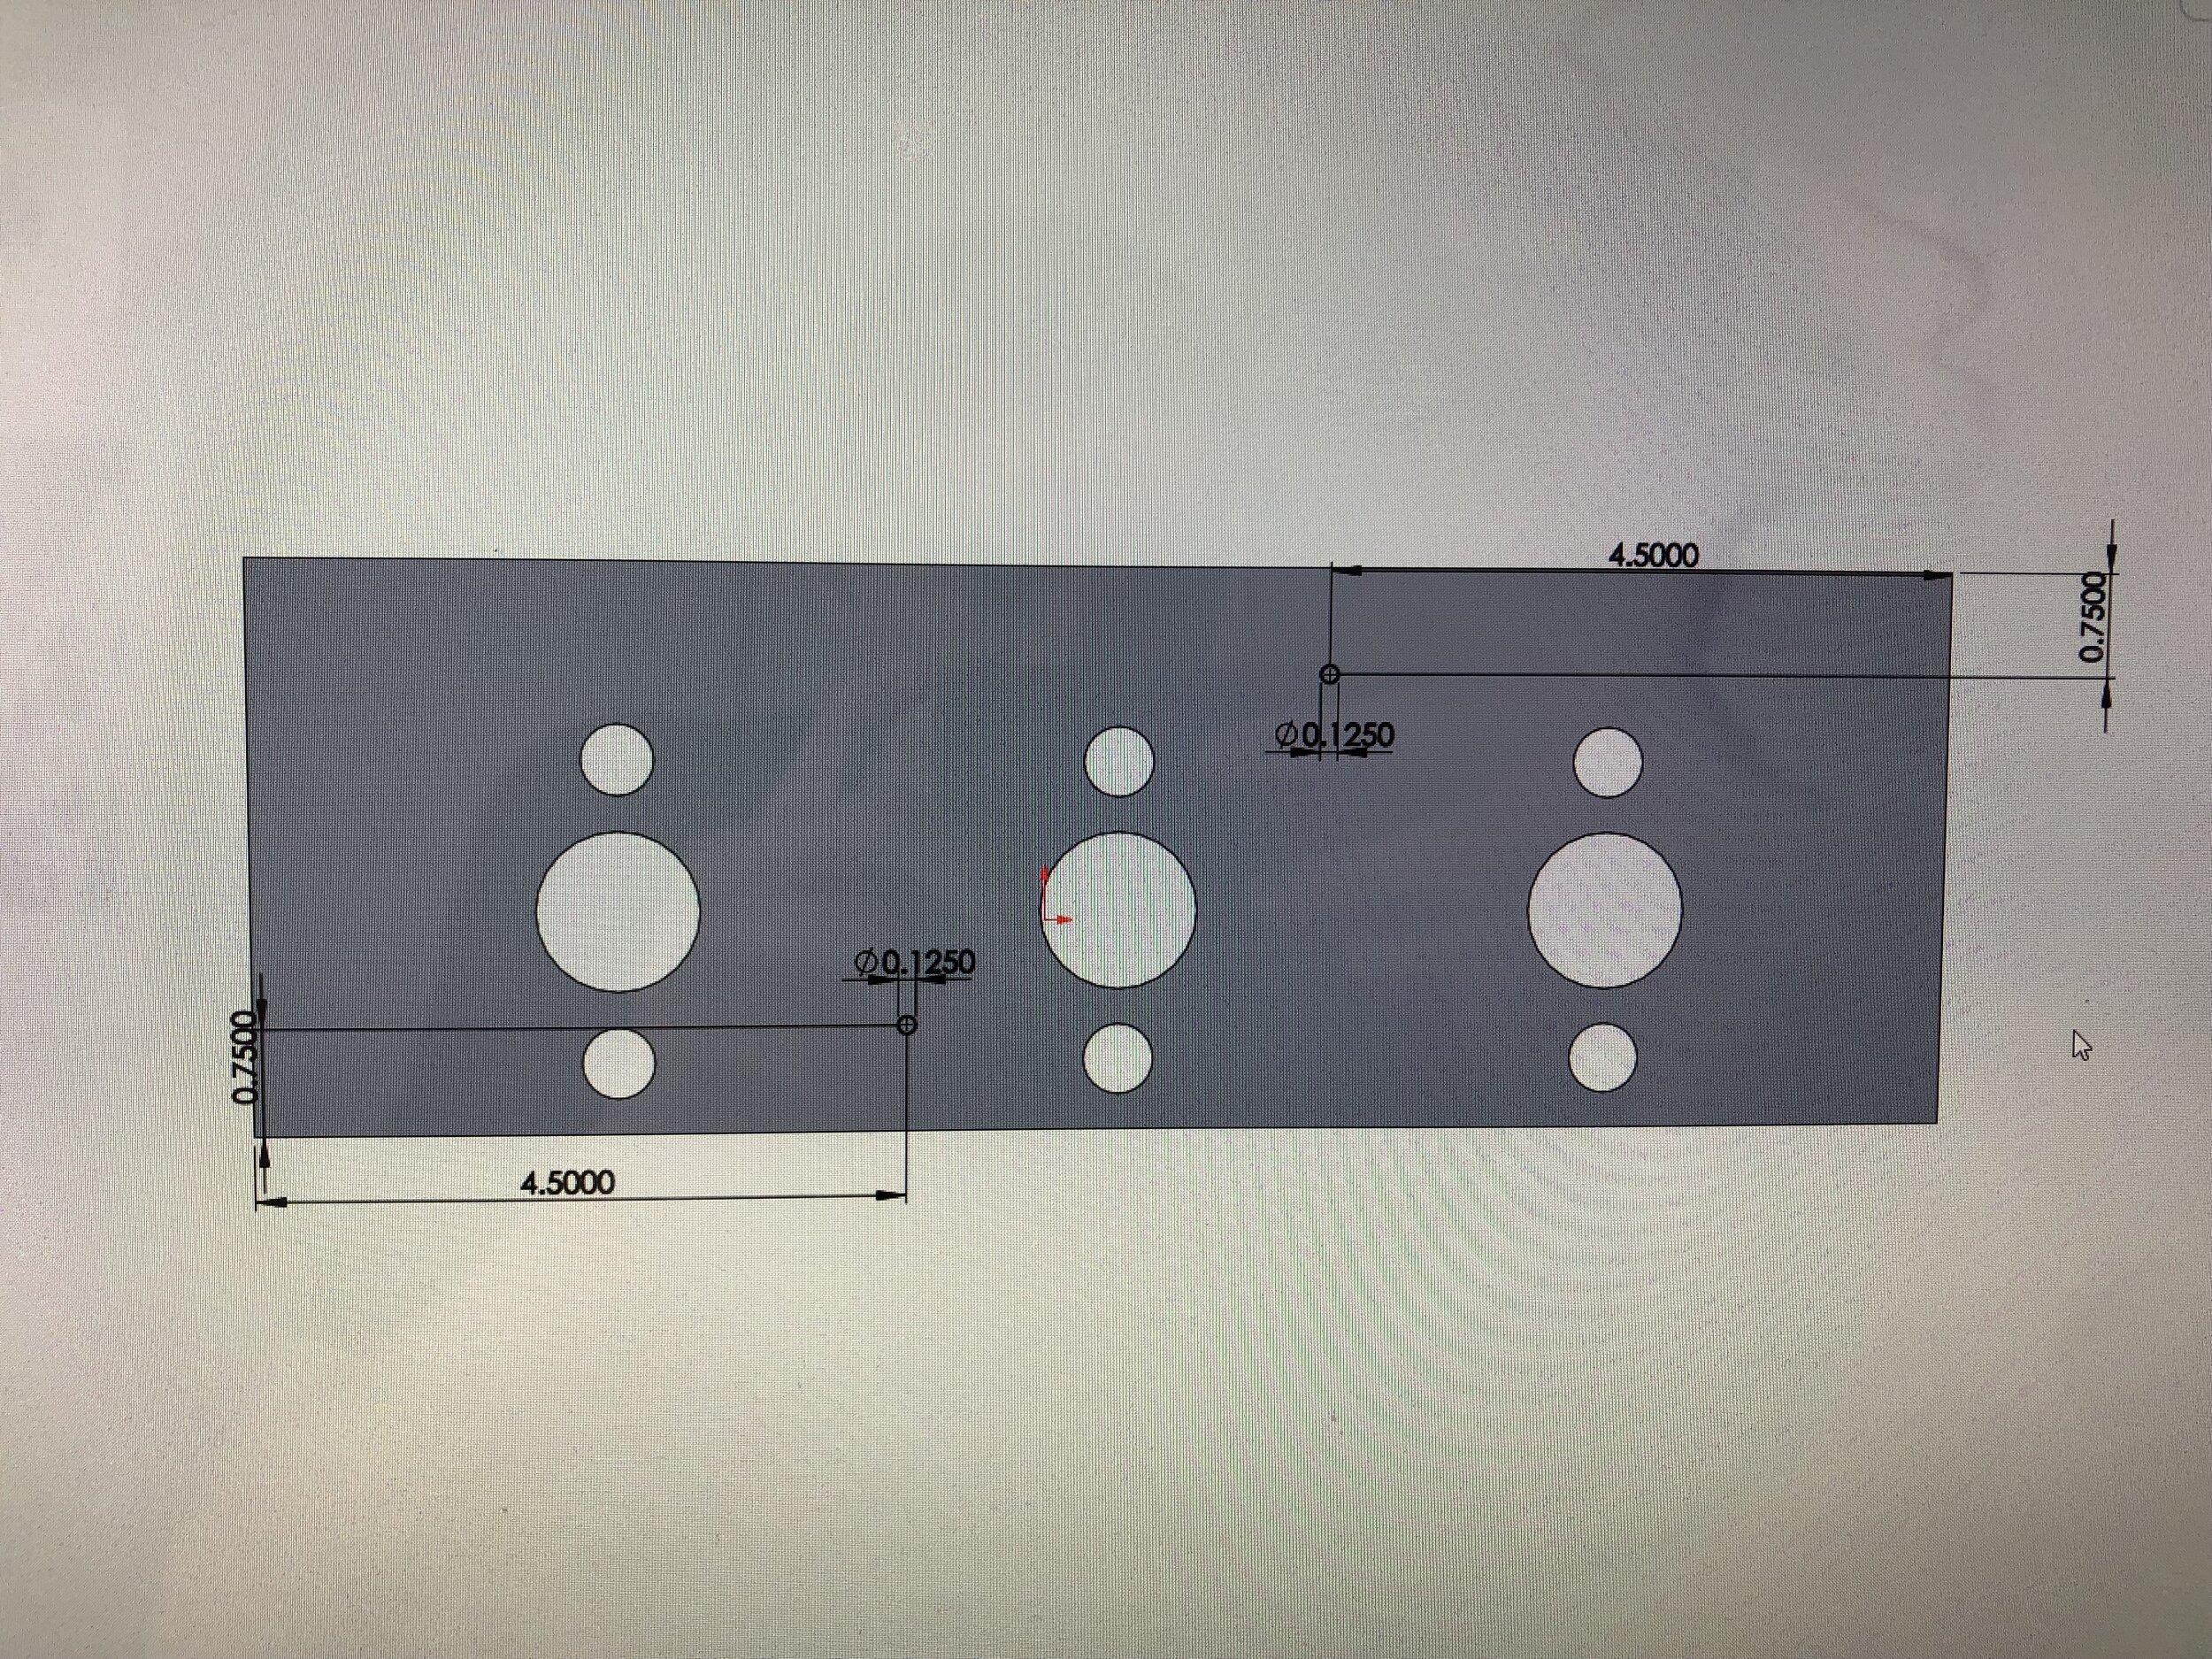
I took on the role of lead designer for exhibitions, which meant I would be the primary designer and builder of the new traveling exhibition. I got to work first on the support structure for the Wentzscope (pictured above) by pulling dimensions off of it to create an initial mockup of the pedestal to which it would affixed.


Once I had a sense for the proportions of the platform, I worked on integrating an interactive carousel that would hold the discs to be viewed through the Wentzscope. These crystal discs contain complex pieces of micro-etched art that the device magnifies for the user. My task was to design a carousel containing three of these discs. The carousel would be fixed to the platform and able to slide left and right so that each disc could be positioned under the Wentzscope. Additionally. each disc would have its own self-contained capsule capable of rotating 360° within the carousel, so that the entirety of the disc could be viewed through the device. The entire structure of the carousel would be made from laser-cut acrylic sheets that would stack up to form the assembly.


Creating this product with all the interlocking parts and articulating components was a challenging design exercise. To achieve smooth motion for the rotating disc chambers and sliding carousel, I used small flange-mount ball transfers set into the base layers of the acrylic assembly. Furthermore, I made sure the carousel housed the disc chambers such that they could not be removed while on display. I built the initial mockup of the carousel with clear acrylic so that I could more easily see how everything fit together during the assembly process.
After milling out the channel in the plywood base for the carousel to slide in, I put the prototype in place. The disc chambers were a bit too tight, so for the final versions I made the middle layer out of chipboard to reduce the overall thickness slightly. For the final version I also included a scape where two bolts could protrude through the bottom of the carousel so that it could be locked onto the plywood platform. Finally, we decided that black would be the most neutral color to use, and would reflect any stray light the least so that the viewer would have ideal visibility of the discs.

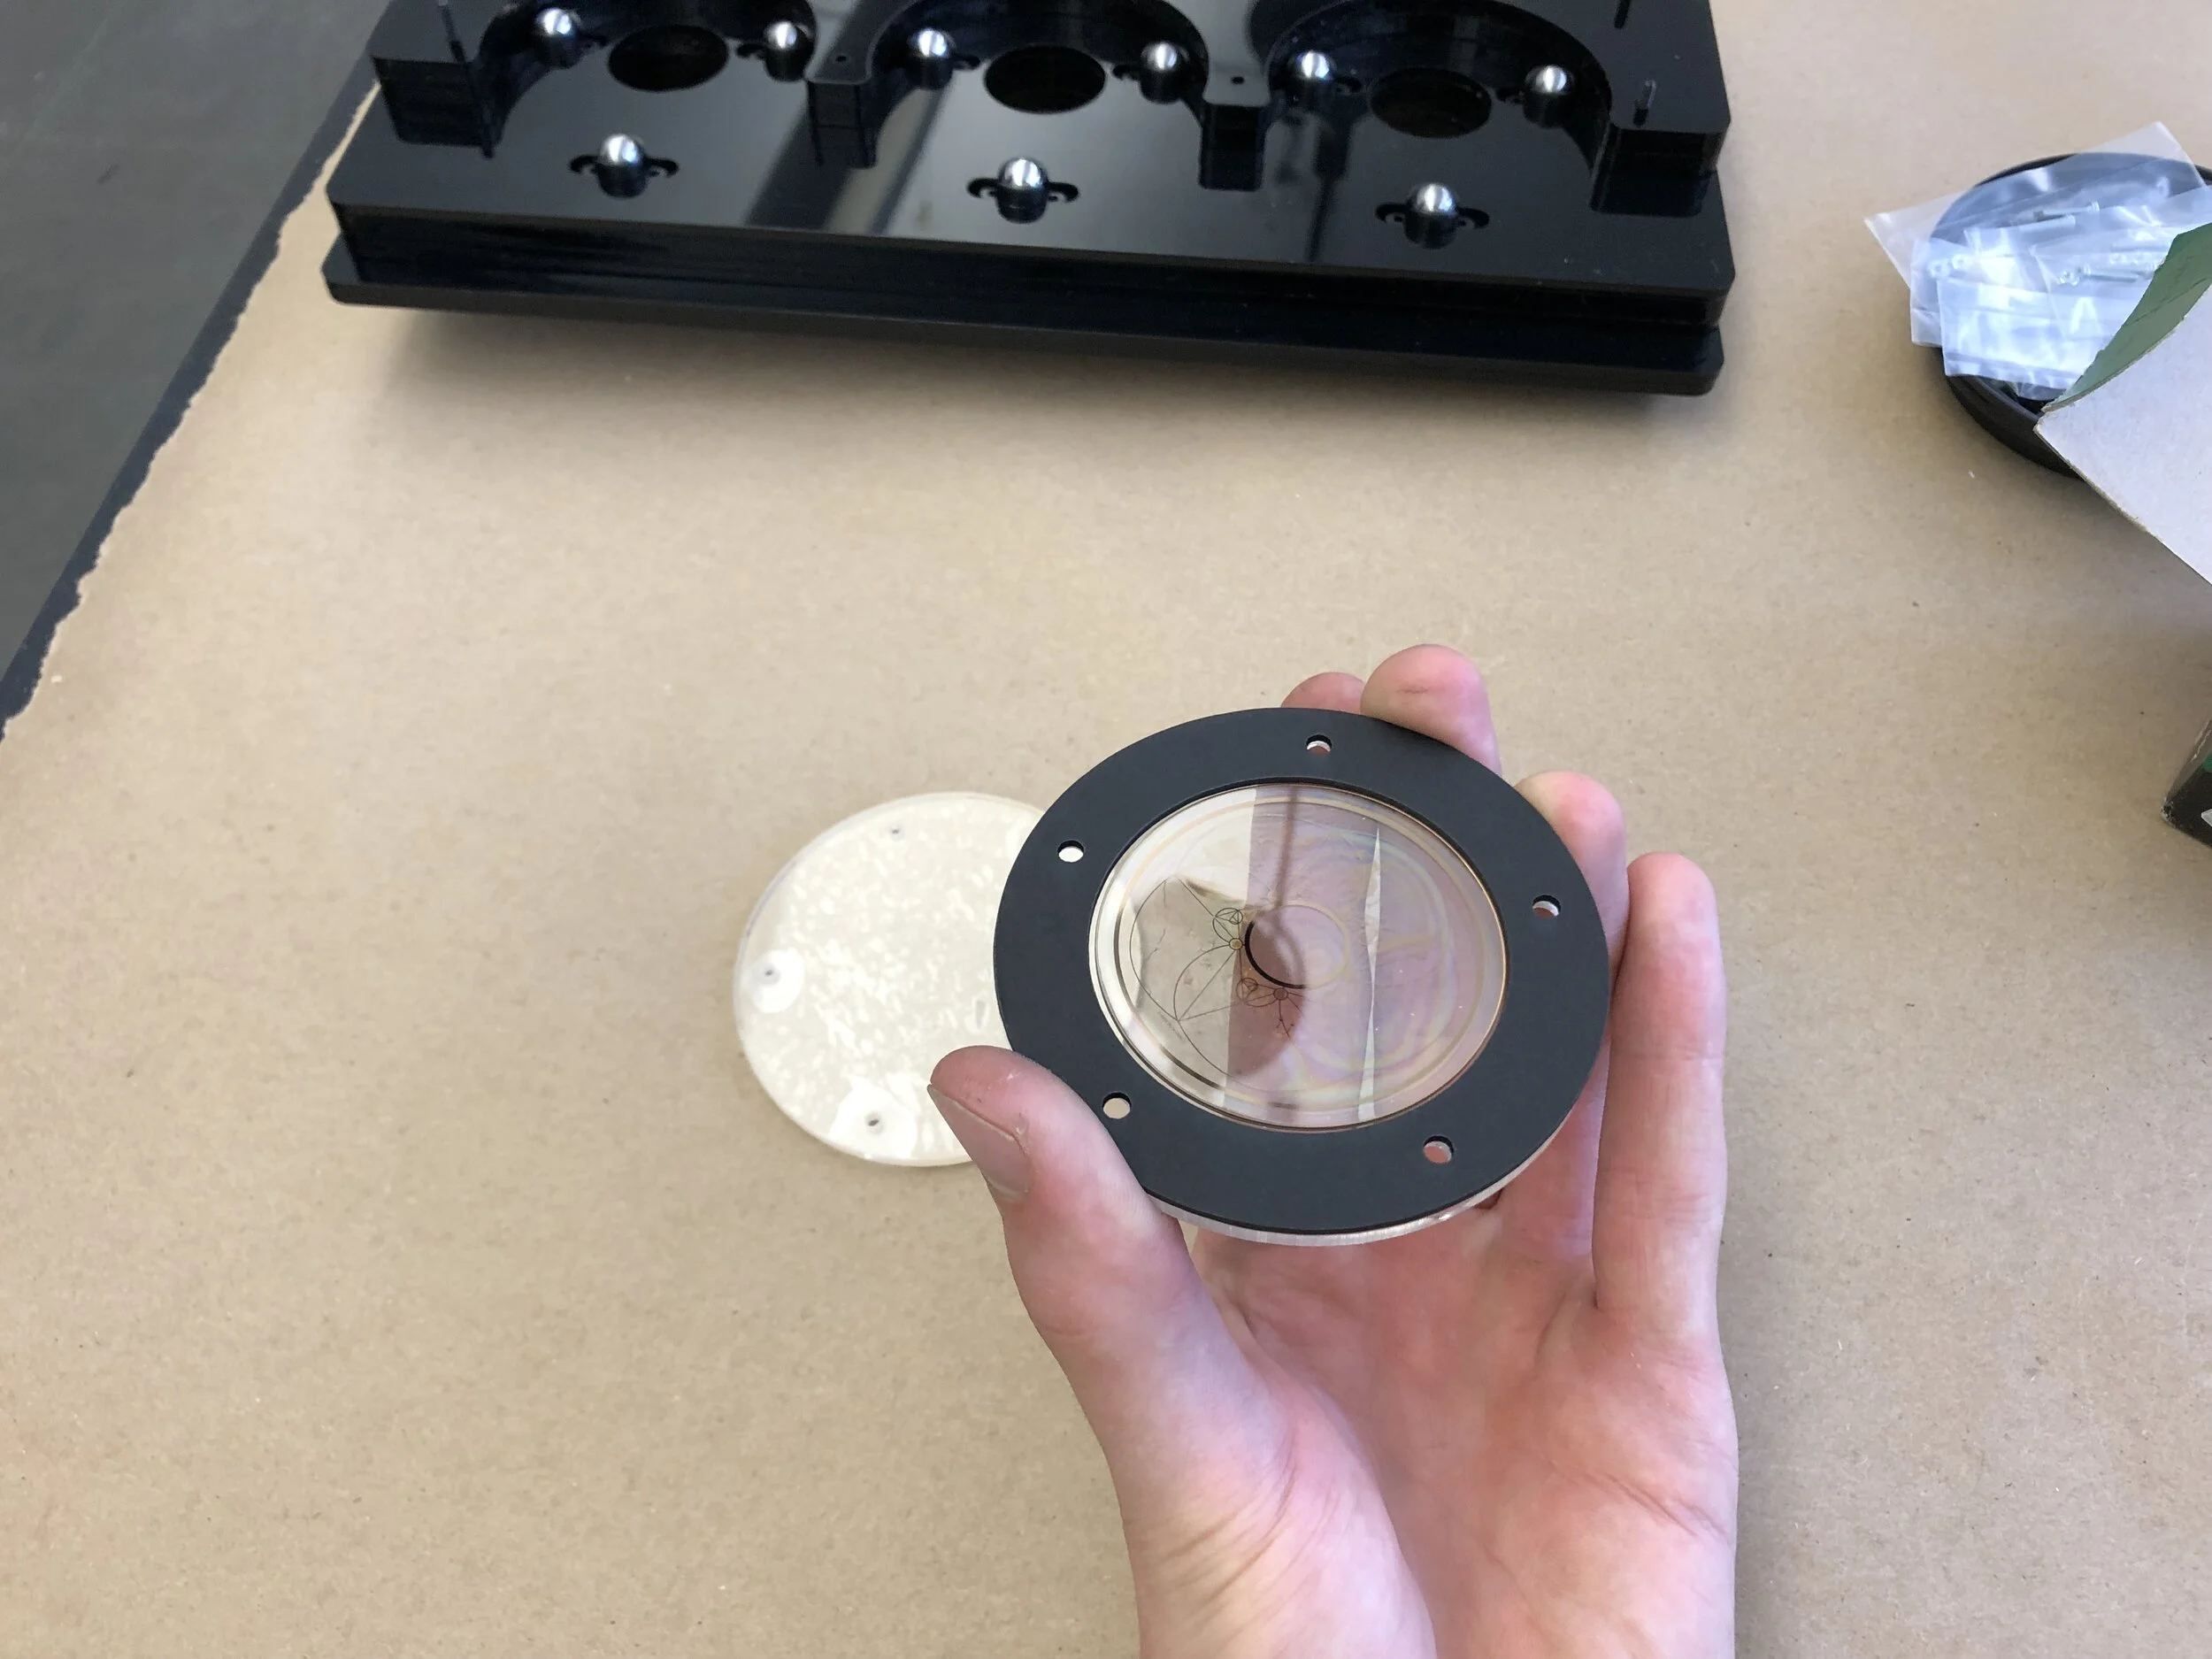
Using thin screws for registration, I assembled the final layers of the structure. I used bondene in a syringe to weld the flange-mount ball transfers to the acrylic. Finally, I set the disc chambers into the carousel before capping it off.
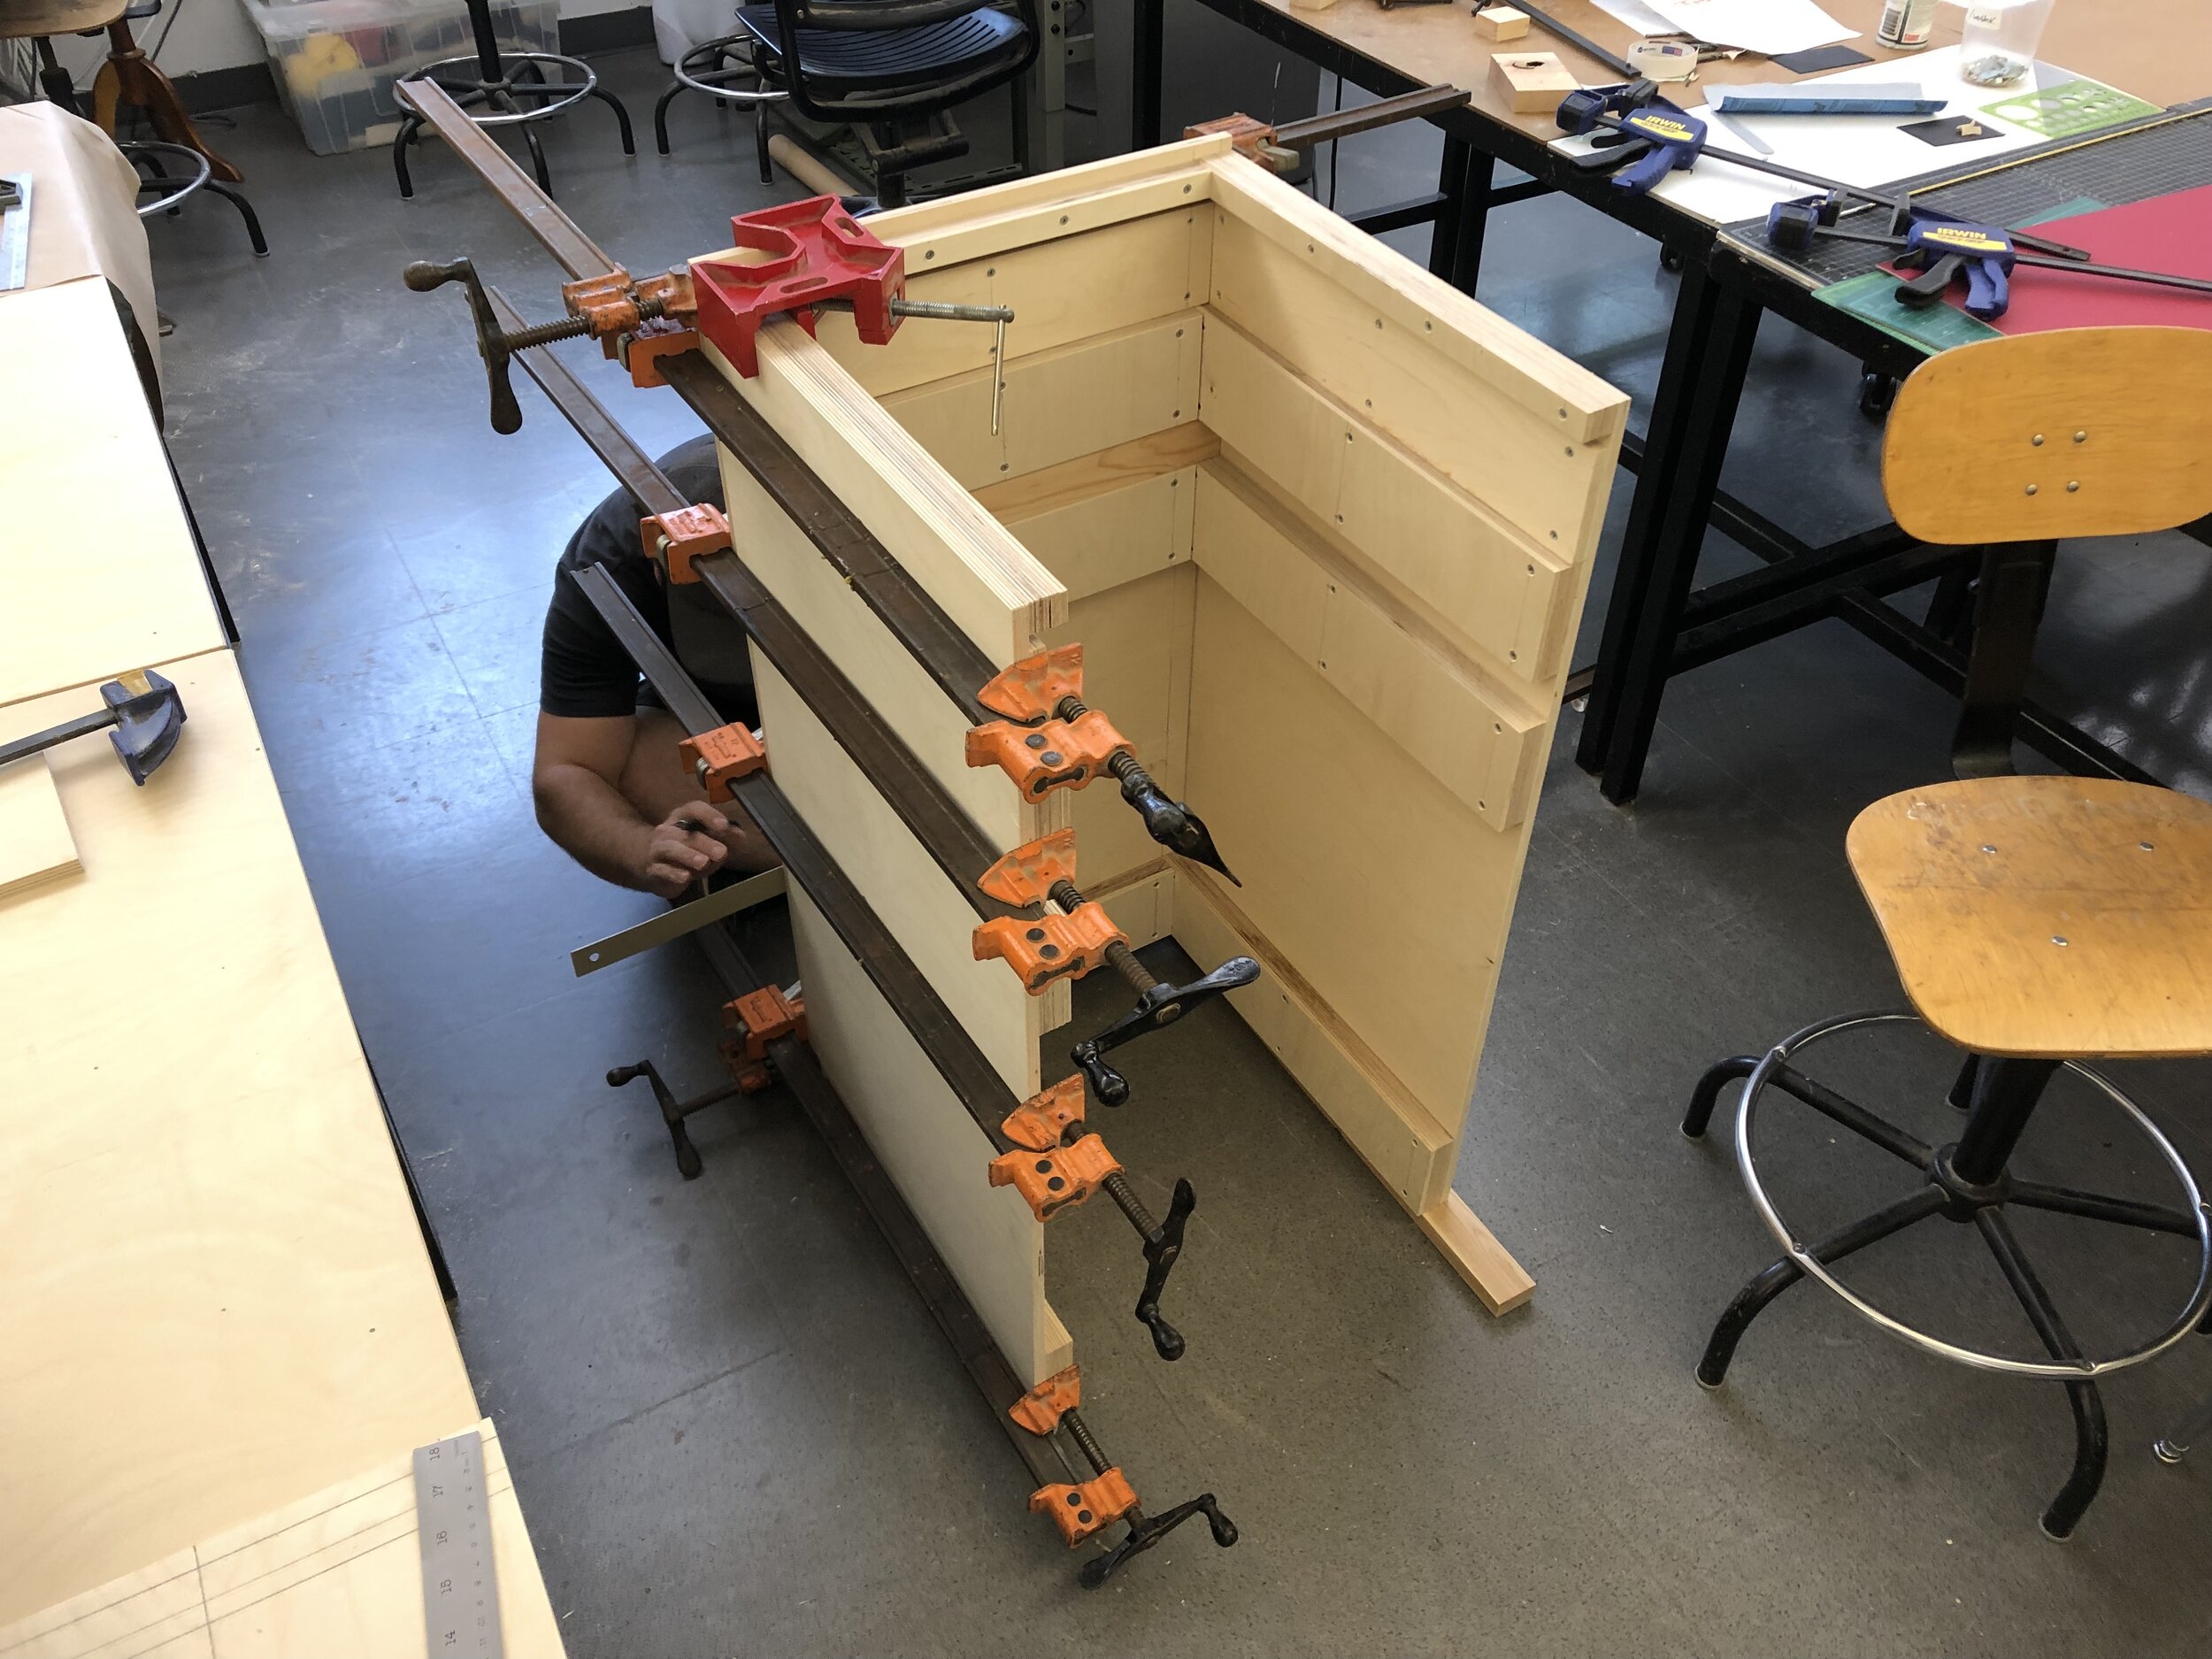
Fabricating Cabinets
Once the Wentzscope base and sliding carsousel were assembled, I proceeded to design and construct the cabinets that would act as the display pedestals. Each cabinet needed to have a wheel base that could be attached to the bottom, and had to allow for the displays to be fixed onto the top. I decided on a 1” x 1” framework that would surround the cabinets. This would provide protection from damage, and the wheel and display bases could be bolted on through holes in the framework. Once I knew what would be stored in each cabinet, I settled on the final dimensions.


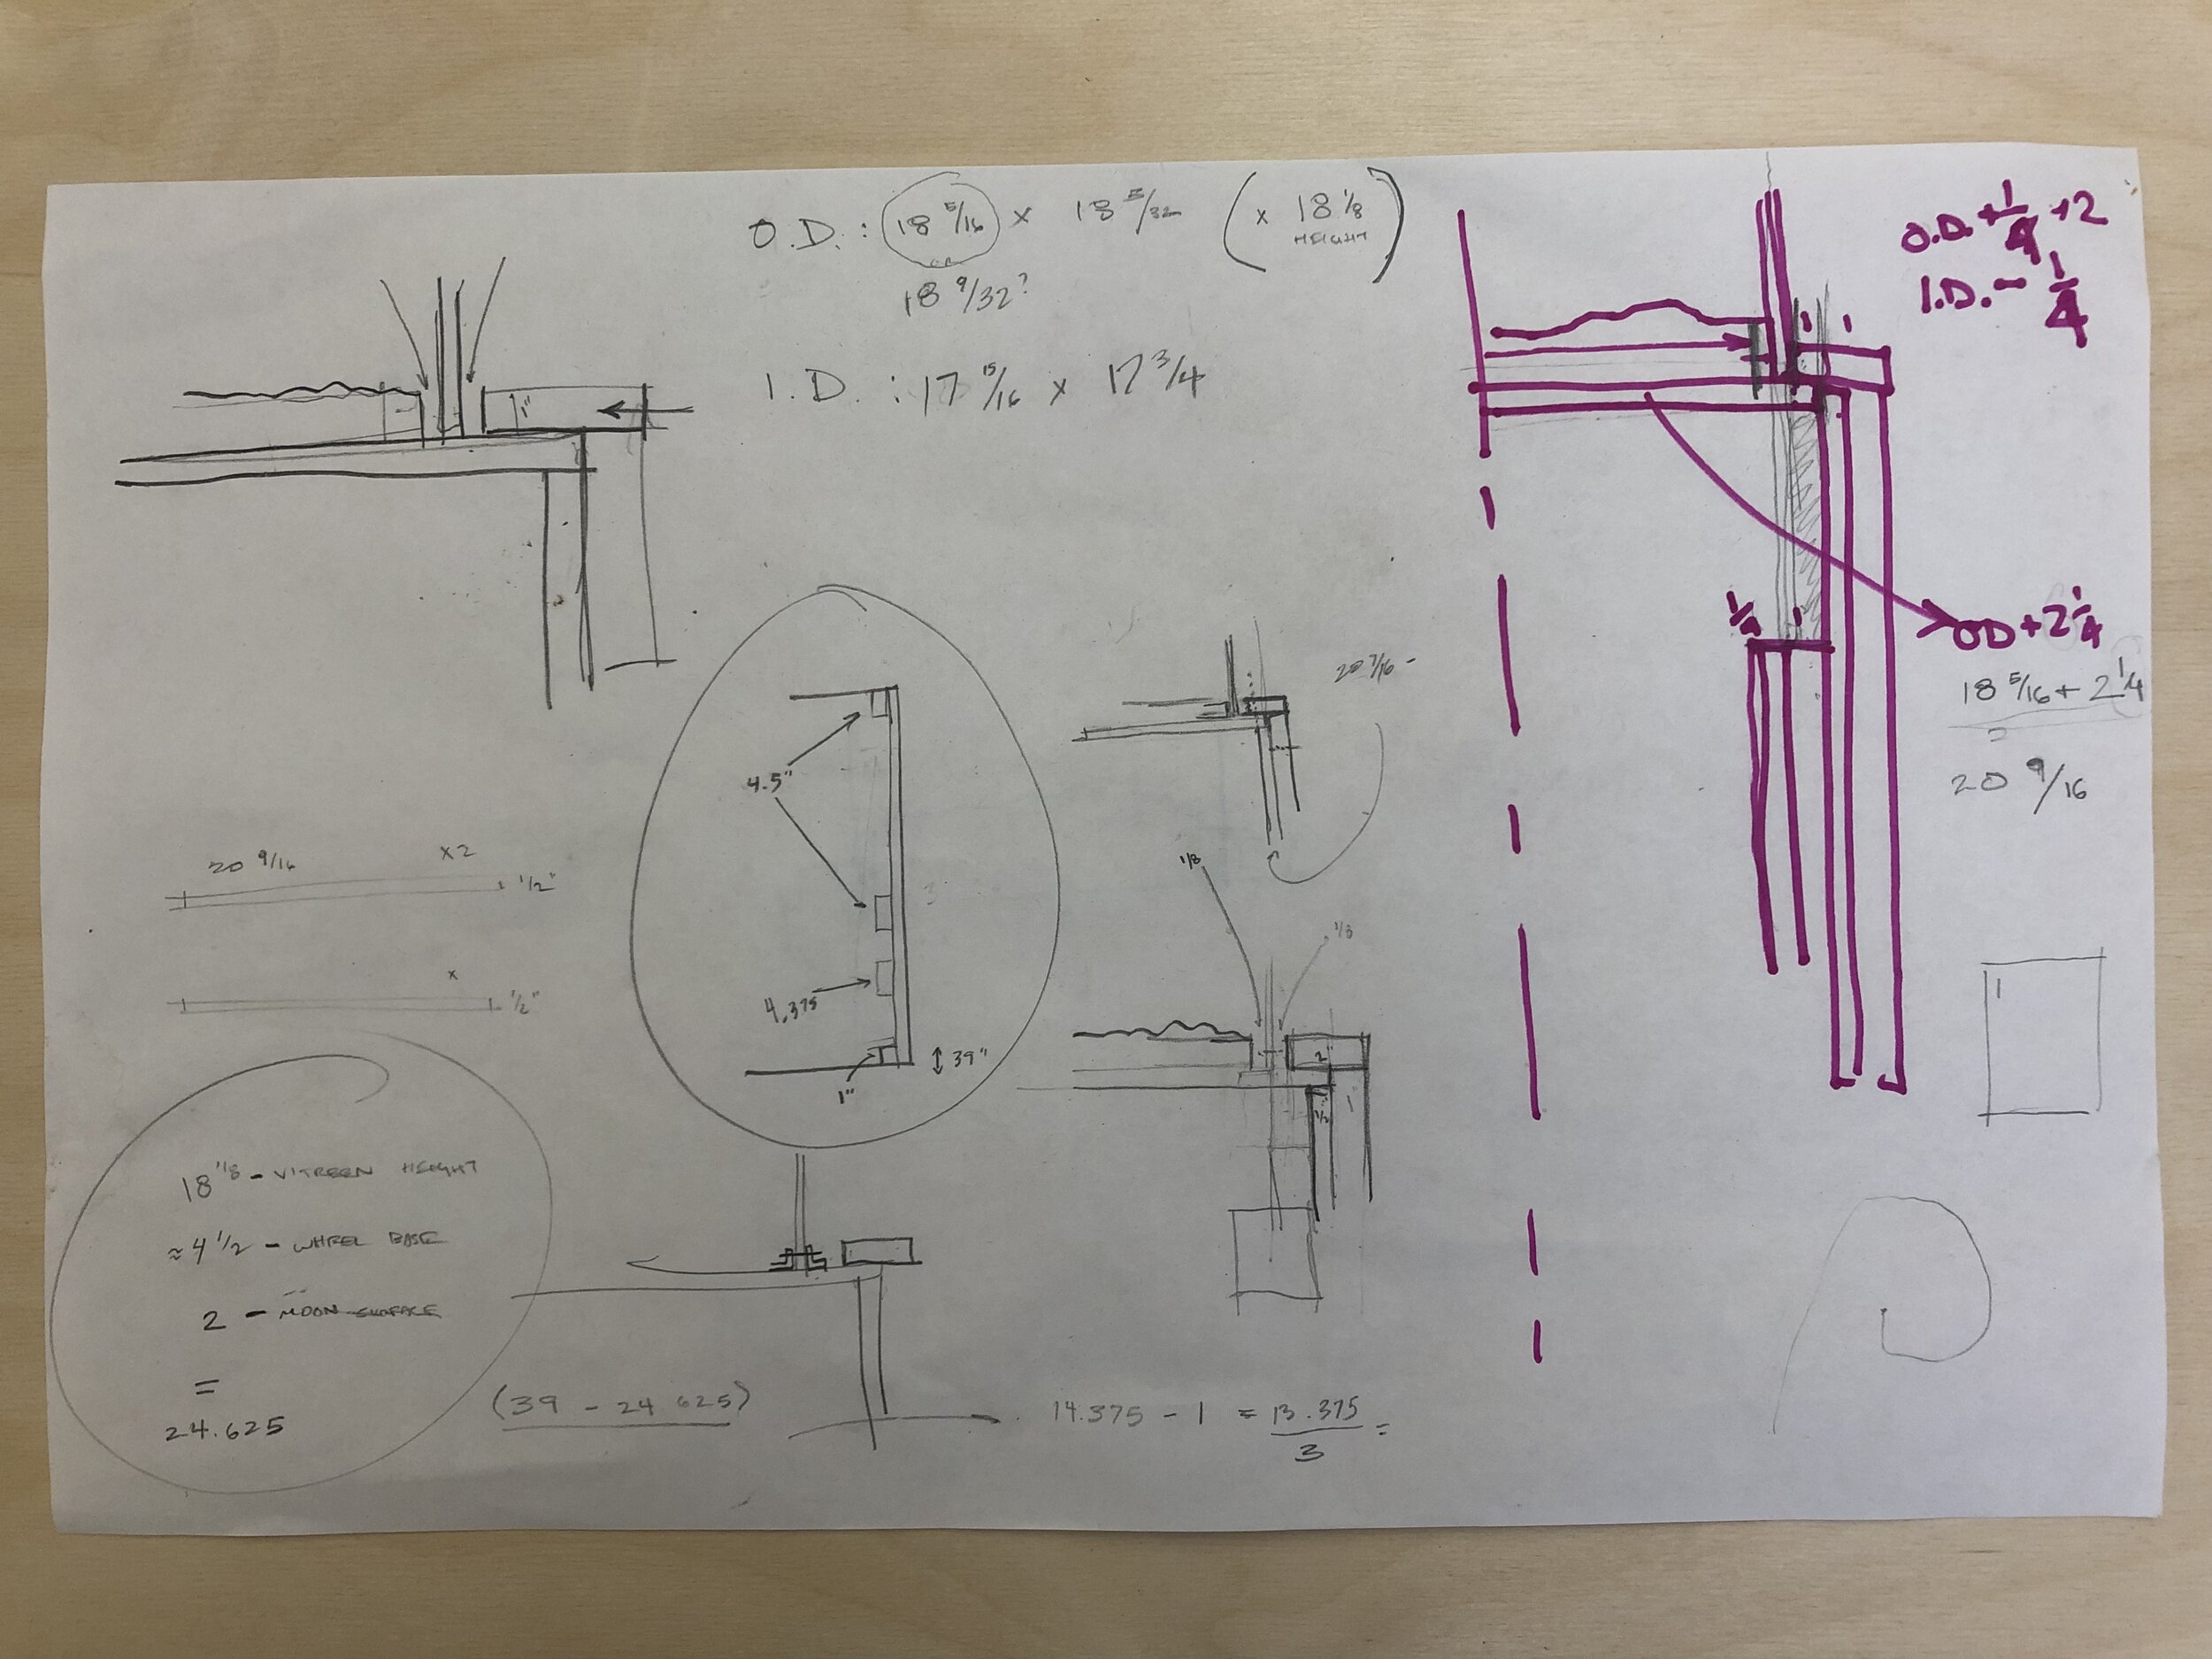
The smaller cabinet would have shelves containing the Wentzscope, its own wheel base, and the four new Moonark Chamber display panels. The larger cabinet, meanwhile, would have room for the platform for the Moonark itself, the acrylic vitrine that would cover it, its own wheel base, and some additional storage. I spaced all the internal shelves so that every item would be locked in place and nothing would be touching each other. After I produced CAD models and technical drawings for both cases, I moved on to the fabrication stage.
Between the walls, wheel/display bases, shelves, and outer framework, each cabinet had quite a few pieces. I cut and labeled each piece alphabetically to keep them organized, then began to attach the shelf pieces to each inner wall. I used spacer blocks to register each piece in place, and made sure everything was placed as precisely as possible since the shelves had to align on all four interior walls. Once each wall had its shelf slots attached, we assembled the cabinet, and added all the outer framework along the edges. After some final sanding to correct any roughness or slight misregistration, the cabinets were fully assembled.


The final step was to line the shelves with foam for maximum protection of each cabinet’s contents during transportation. After checking that the displays and wheel bases all fit well both inside and outside the cabinets, they were ready for display.


In addition to the cabinets, we also built a display shelf for the four Moonark Chamber display panels. This shelf would be used only for domestic shows where the exhibit didn’t need to be shipped. More specifically, we built it for the debut show of the new exhibit at the Miller Institute for Contemporary Art at CMU.
Debut Exhibition
The debut exhibition at the on-campus gallery was a great way for us to practice transporting and setting up the traveling exhibition, while also integrating other elements into the display. We attached the wheel bases to the cabinets, rolled them into position in the gallery, then stowed the wheel bases and removed the display materials from within. After bolting the displays to the top of the cabinets we reattached their fronts walls, and their transition to display pedestals was complete.


The addition of the angled shelf for the Moonark Chamber display panels, as well as a monitor to show promotional video (including my Peregrine Lander animation) added nice variety to the exhibition. The final touches to the show included a large, glossy-black, vinyl wall graphic of a poem placed above the exhibition, and a projected image of the moon above in the corner. The overall collection of graphics, site-specific displays, and traveling installation materials made for a beautiful debut exhibition in the space.